


How To Install Vinyl Decking Properly

Trust The Professionals
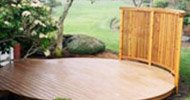
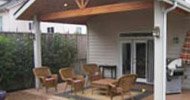
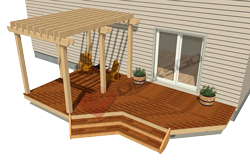
To install vinyl decking properly so you can go from an old beat up the deck to this smooth perfectly watertight surface is harder than it looks.
Trust me on this!

How could resurfacing an old wood deck with PVC sheet vinyl be difficult? The pros make it look easy, gluing, welding.
But this skill requires a lot of practice and finesse to install vinyl decking flat, overlapped, and triple welded for a guaranteed watertight job.
And that doesn't include re-sheeting the deck with plywood and making it perfectly smooth, sloped, and with the drip edge.
Steps To Installing A Vinyl Deck:
Remove Old Boards And Resheet With T&G Plywood
Rip up everything to the joists in order to resheet the entire deck.

An Old Deck
Uninstall the old railings.
Remove the deck boards. Inspect and fix the joists. Resheet with at least 5/8 G1S (smooth one side) fir plywood and preferably 3/4".
A New Deck
If this is new deck construction its much easier as you just have to frame and sheet the deck.
But make sure you have at least a 2% slope. That is about 1" over four feet.
Glue and screw the sheeting down.
Grind Smooth All Joints Between Plywood

This is an essential step for a vinyl decking installation.
PVC sheet vinyl is anywhere from 40mil to 60mil thick.
So it is effortless to see any bump or depression from the deck through the vinyl. This is especially true in certain light conditions.
Nothing looks worse.
.
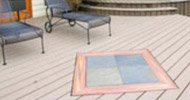
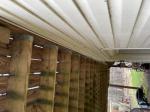
Drip Edges Are Required

Metal drip edge is one thing you have to install around the entire perimeter of the deck.
This picture shows the bull nose before the drip edge is nailed over it.
Drip edge allows the water to drain over the deck and drip freely to the ground.
If you don't install it, the viscosity of the water ensures that is dribbles down the fascia of the deck leaving a track of dirt, mildew and staining over time.
It looks awful and it also contributes to premature rotting and wear and tear on the deck.
Just tack down the drip edge with flat head galvanized nails. You will trowel leveling cement over this later leaving a completely smooth surface for the glue and vinyl to adhere to.
Level The Entire Deck Surface Before Vinyl

Cement floor leveling compound is the trick to a perfectly level deck.
Mix up a small amount of this fine portland cement mix.
You want it to be reasonably liquid so that it naturally self levels any depressions, knot holes, nail holes, etc.
Use a 12" wide trowel and pay particular attention to the ground down areas between the sheets of plywood.
Once it cures, you are ready to install the vinyl decking membrane over the top.
Apply Adhesive To Plywood

Apply glue generously over an area equivalent to one sheet of vinyl material at a time.
You should snap a chalk line across the deck marking where the glue extends to. You want to have enough vinyl that it drapes over the drip edge by at least 1" to be safe.
Latex glue specifically designed for installing vinyl decks is required or a solvent based contact cement. But to be honest, contact cement is trickier.
You have to apply it to both the deck and the back of the vinyl. Then you have to use a rolling technique that takes practice to gradually roll out the vinyl over the tacky glue without trapping air bubbles.
It's much easier and just as effective to apply the glue as shown here using the trowel.
Roll Out The PVC Vinyl

Sounds simple, but you don't just "roll it" out.
The best way is to install the vinyl decking membrane by folding it in half along its length and then lining up one side along the chalk line.
Once you know the edge is in line with the chalk, you can then slowly roll or fold over the vinyl on a bit of an angle.
Move slowly down the vinyl's length, ensuring it goes down flat and apply equal pressure to ensure full contact and no air is trapped.
Welding The Seams
|
Each course of vinyl decking material is overlapped by 1/2". Triple welding of the overlapped seams ensures a waterproof seal. First Weld This first pass fuses the edge of the lower sheet of vinyl with the underside of the top sheet of vinyl. |
 |
|
Second Weld This second pass then fuses the entire 1/2" overlapping surfaces of the vinyl membrane together. The top side of the lower sheet and the underside of the top sheet of vinyl are now one piece. |
 |
|
The Third Weld This is the final pass, which joins the finished edge of the exposed cut edge of the top layer to the lower layer of vinyl. It is as much for show and proof of the installer's skill as it is for water protection. All of this welding requires a lot of skills and experience. It is easy to overheat the vinyl and burn it, leaving black spots that permanently mark the vinyl. That's why I say, don't even bother trying to do this yourself. You will regret your decision. Trust me. |
 |
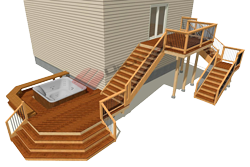
The Finished Deck - Waterproof Vinyl Decking

You now should have a very good understanding of how to install vinyl decking. But don't install it yourself. This is just to help know how it works. Let the pros do it.
Check out these Vinyl Decking Experts:
Home > Building A Deck > Install Vinyl Decking


Recent Articles
-
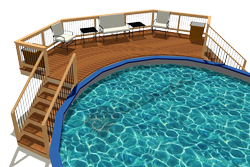
10x8 6 person spa deck
Jul 26, 22 12:17 PM
I think I might be over-engineering this but I live in CT and I'm also worried about snow weight. Adding a 8x10 deck attached to existing deck, 2x10's -
Hot tub weight
Jul 26, 22 12:16 PM
 I won an inflatable 6 person inter hot tub. I have a large deck. 12x 20 on both sides of the house. With a header to the house and the deck was built 6
 -
Deck around a swim spa
Jul 26, 22 12:15 PM
I'm putting a swim spa into an inground concrete bunker and will build a deck around it. I have been advised to keep the deck joists a minimum of 6 inches


It's time to start
making your memories.

How-To
Go Learn More
© 2004-2022 Decksgo.com. All Rights Reserved.