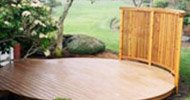
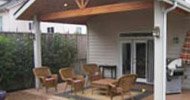


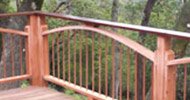


Looking For Deck Bench Plans?
Try these classic bench plans for your deck.
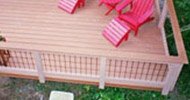
Here is one of my basic plans for building a 6’ deck bench without a back.
It can be free standing on the deck or the leg supports can be screwed to the deck. These plans will ensure your building success!
OK, here's how to build your own.
Material List

- 4 – 2x6x14 ½” Legs
- 4 – 2x4x14” Leg to Seat supports
- 2 – 2x2x11 ½” Leg to Deck mounting strips
- 4 – 2x4x69” Bench seat
- 2 – 2x4x72” Seat fascia, sides
- 2 – 2x4x17” Seat fascia, ends
- Stainless square head 3” wood screws
Step 1

Take 2 Legs, and space them ½” apart. Screw one of the Leg to Seat supports perpendicular to the Legs and flush with the top edge of the Legs.
Allow the Leg to Seat support to extend about 1 ¼” beyond opposite sides of the Legs.
Attach the second Leg to Seat support to the other side of the Legs.
Step 2
Take those same legs and now attach the Deck mounting strips. Screw one of the 2x2s flush to the bottom edge of the Legs.
Flip the Legs over and screw the other 2x2 to this side of the leg.
Step 3
Repeat steps 1 and 2 for the second set of legs.
Step 4

Position the 2 sets of legs on the deck at about 56” apart (on center) in the finished position.
This will allow the bench seat to overhang the Seat supports by about 8” on either side.
Step 5

Position the bench seat 2x4s on top of the Legs and Seat Supports. Push them together, eliminating any gaps or leaving only very small gaps.
Be sure that the outside 2x4s do not extend beyond the ends of the Seat Supports.
Don’t worry about not leaving gaps. The boards will dry out and shrink in about 1 to 2 months leaving a nice 1/8” to ¼” gap.
Screw the 2x4s (2 per board) into Seat Supports beneath them. The 2x4s should now be parallel with no gaps so you have a perfect 69”x14” bench seat.
Step 6

Take the 2x4s for the Seat Fascia sides and ends and cut each end at 45 degrees on a chop saw or miter saw for accuracy.
With a friend helping, hold a Fascia side piece against the edge of the outside 2x4 board of the bench seat.
Keep it flush with the top of the bench seat and be sure to keep the inside edge of the mitered corner in line with the end of the 2x4 bench seat board.
Screw one end of the Fascia into the edge of the 2x4 bench seat board. Now screw the other end in place. Space more screws at about 12” apart.
Step 7

Repeat Step 6 for the other Fascia side piece on the opposite side of the bench. Then position the Fascia end pieces in between the side fascia.
They should fit perfectly like a piece of a puzzle.
Screw one screw through the fascia end piece into each bench seat board and then two screws at each miter corner securing the Fascia ends to the Fascia sides.
Congratulations! You now have a very nice looking outdoor bench for your deck.
Note: Steps 6 and 7 are the trickiest part of these deck bench plans and require attention to detail to get the miter cuts tight.
Follow These Plans Exactly or Modify As You Wish
So there you have it, some easy to follow bench plans.
You can modify these in any way you wish. The real benefit of this is just to show you how the basic structure is built and secured to the deck. From there you can adlib a bit to get the exact design you are looking for.
Home > Deck Benches & Extras > Deck Bench Plans


Recent Articles
-
Pergola on brick paver
Apr 05, 25 05:36 PM
I have a brick paver patio that has been in for 10 years and I would like to know if the deck anchor will penetrate the gravel/sand base -
Durability of Titan deck foot
Apr 05, 25 05:20 PM
Hi, can you advise the estimated life of a Titan Deck Foot installed in the ground? How long is it expected to last? I live in an area in Ontario Canada -
10x8 6 person spa deck
Jul 26, 22 12:17 PM
I think I might be over-engineering this but I live in CT and I'm also worried about snow weight. Adding a 8x10 deck attached to existing deck, 2x10's


It's time to start
making your memories.

How-To
Go Learn More
© 2004-2026 Decksgo.com. All Rights Reserved.