


Tips For Perfect Stair Stringer Layout
How you layout your stringers depends on the style of your stairs.
Will your treads be fully exposed as with an open or notched stringer?
Do you prefer the tread nosing to be set within the periphery of the width of the outer stringers?
Do you want open or closed rises?
Think it through as I show you the drafting and layout techniques for all of them plus building code references.

Building Code Basics

What is the Unit Rise & Run?
Remember the Total Rise?
Divide that number by the ideal Unit rise of 7-3/4". The quotient is the number of rises you will trace out on the 2x12.

Tracing Out First Unit Rises and Unit Runs on Stringer
Get a carpenters framing square and if you have little buttons that clamp or screw onto the square even better.
Align the rise and run measurements on the square with the edge of the stringer. This will establish the starting point for the stringer.
Trace out the Unit Rise and Unit Run as shown by the measurements on the square.

Extend the horizontal line across the 2x12.

Finish off by extending the vertical line down to the edge of the board.

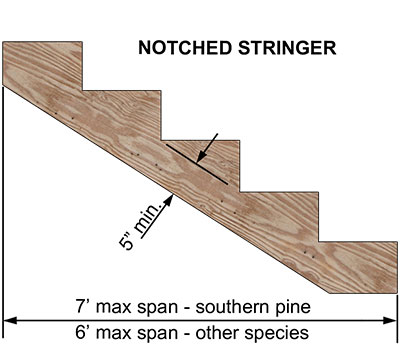
You want to end up with something like this if your are planning a cut and notched stringer.
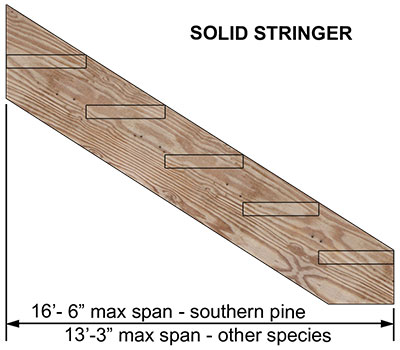
Laying Out a Solid Stringer
Solid stringers can only be used on the outer sides of a set of stairs.

But you have some freedom in the way you design the tread locations.
A nice finished look uses a design where the nosing of each tread is hidden within the width of the stringer.
Notice how the nosing of the treads does not stick out beyond the edge of the 2x12.
Creating this kind of layout requires a few simple tricks.
Remember Maximum Stringer Spans
Here Is How It's Done

We use this little line with the two dots as the "baseline" or the line from which we will reference each unit rise and run.
Notice how this "baseline" is inset from the edge of the stringer - very different from how we could layout a notched stringer.
Then we mark off the end cut line of the stringer and proceed to trace out each sequential unit rise and run.
Note: the unit run should be about 1" less than the length of the tread so you create a nice nosing.

Use this second of middle line as the marker for the nosing of the treads.
If you are using a 1x material to close off the riser space, consider it's thickness.
Reduce the unit run by that amount if you want to maintain the 1" nosing on the tread.
At the last rise, draw the bottom cut off line.

Some Other Great Reading
You have now learned the in's and out's of stair stringer layout whether it is for a notched or solid 2x12. You have to know both methods because many stairs require a midspan stringer which is always notched.
Now it's time to find out how to carefully cut out the notches.
Home > Deck Stairs > Stair Stringer Layout


Recent Articles
-
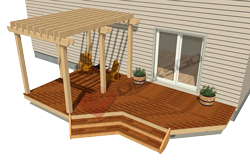
Pergola on brick paver
Apr 05, 25 05:36 PM
I have a brick paver patio that has been in for 10 years and I would like to know if the deck anchor will penetrate the gravel/sand base -
Durability of Titan deck foot
Apr 05, 25 05:20 PM
Hi, can you advise the estimated life of a Titan Deck Foot installed in the ground? How long is it expected to last? I live in an area in Ontario Canada -
10x8 6 person spa deck
Jul 26, 22 12:17 PM
I think I might be over-engineering this but I live in CT and I'm also worried about snow weight. Adding a 8x10 deck attached to existing deck, 2x10's


It's time to start
making your memories.

How-To
Go Learn More
© 2004-2026 Decksgo.com. All Rights Reserved.