


five ways to build deck footings that last
Deck footings take work to install . You have probably experienced all digging and preparation a proper footing foundation for any light outdoor structure like a deck or a shed requires.
Well did you know that even with all that work it can all be for not if you don't follow a few very simple standards or instructions during the construction?
If you dig too shallow and not wide enough the pier can be pushed up with frost heave.
If your footing width is wider than the thickness it can crack and break apart.
Don't let this happen to your deck.
Check out these illustrations and follow these tips that are based on the building code recommendations and you should be fine:
A Straight Concrete Pier
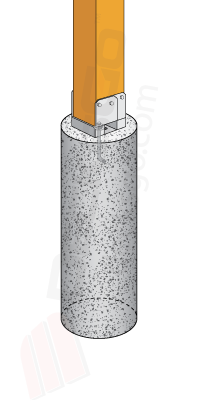
This is a great dependable style of footing that uses a standard concrete form without any flared or bell shaped bottom.
If you are planning to dig and you have soil with a high bearing capacity this style of concrete pier will do the trick for you.
Notice the post anchor on top is secured to the concrete with a J bolt dropped into the cement and the post is set up off the concrete surface.
"X" is the desired width of the bottom of the pier and it is the area that will bear all of the weight imposed on it from the tributary area of the structure above it.
So whatever load value is imposed on that surface area, make sure it is less than the maximum load that the soil can bear, or your deck footings will sink, and they will not support the weight.
A Straight Concrete Pier With A Wider Flat Footing

Just add a wider base and you substantially reduce the imposed load on the soil below.
Simple enough concept if you think about it.
By using the same diameter of pier as shown in the first diagram you can easily increase the surface area below it by digging the hole wider and pouring a footing with a larger surface area.
This will spread or dissipate the weight from the above tributary loading area over a larger area of soil and reduces the per square foot load on the soil.
It's a bit like walking in the snow with snow shoes or high heels. What footwear would float you up higher on the surface? :)
Key Points to Remember
"Y" is the distance the deck footings extend beyond the cylindrical pier. The thickness of the footing "Z" must always be greater than that distance.
If "Z" is less than "Y" and you over load this pier, the concrete is
likely to break along the bottom surface "X". The break line would be
like a 45-degree angle flaring outward from the wall of the pier. To avoid that ensure that "Z" is greater than "Y".
A Straight Concrete Pier With A bell shaped Footing

Going one step further, use a pre formed bell shaped footing to adapt to a variety of form dimension diameters.
It takes a lot of time and effort to lay down a square 2x4 footing frame in order to make the footing seen above.
But instead you can use a plastic bell-shaped form like this one. There are a couple types available on the market and they are usually adaptable to sonotube forms of differing diameters.
A good size for a common backyard deck is a 10" or 12" diameter for the sonotube and a 20" base diameter.
Of course, you can get a 24" base size and it will spread weight over an even greater surface area.
The one down side to this is the extra digging involved. For example, if you live in a place like New Hampshire where the frost level might be 48" or more, you will have a lot of back breaking digging to do.
You could hire an auger for about $50 a hole which will speed things up, or you can check out here a new concrete form system that mimics this style and shape and will save you time, money and labor. I think it is a brilliant idea.
Or Use A pyramid Shape Form From Top To Bottom

This footing is not moving anywhere!
As you can see here, you can take the concept of a bell shape and go literally hog wild. Here, the cone shape begins at the surface or just below and flares outward at 30 degrees or less off vertical.
The flat part at the bottom must be at least 6" thick. This is a common rule for footing so don't forget that.
You will notice that the support post is also embedded deeply into the concrete and extends no closer than say 4" from the bottom of the footing.
With these style of deck footings there is a lot more work to do. You will have to dig a wide hole and straight down to match the diameter of the base. Also, anytime you permanently set a wood post into concrete you risk rot and decay.
So, any post used in this manner should be treated for ground contact because overtime it will be subject to a lot of moisture.
Simplest Concrete Footing Method

Save time and money on concrete with this style.
For a quick and dirty concrete foundation, this method can do the trick.
You can get away with usually a 15"x15" base and then at least 6" thick so you don't crack the deck footing. That is assuming you are using a 4x4 which is 3.5" square.
You will have to wait for the cement to cure and then back fill over top.
Since the post will be embedded in the concrete and in the soil, using a post treated with preservative for ground contact is a must.
This method has the main benefit of saving a lot time mixing cement.
  |
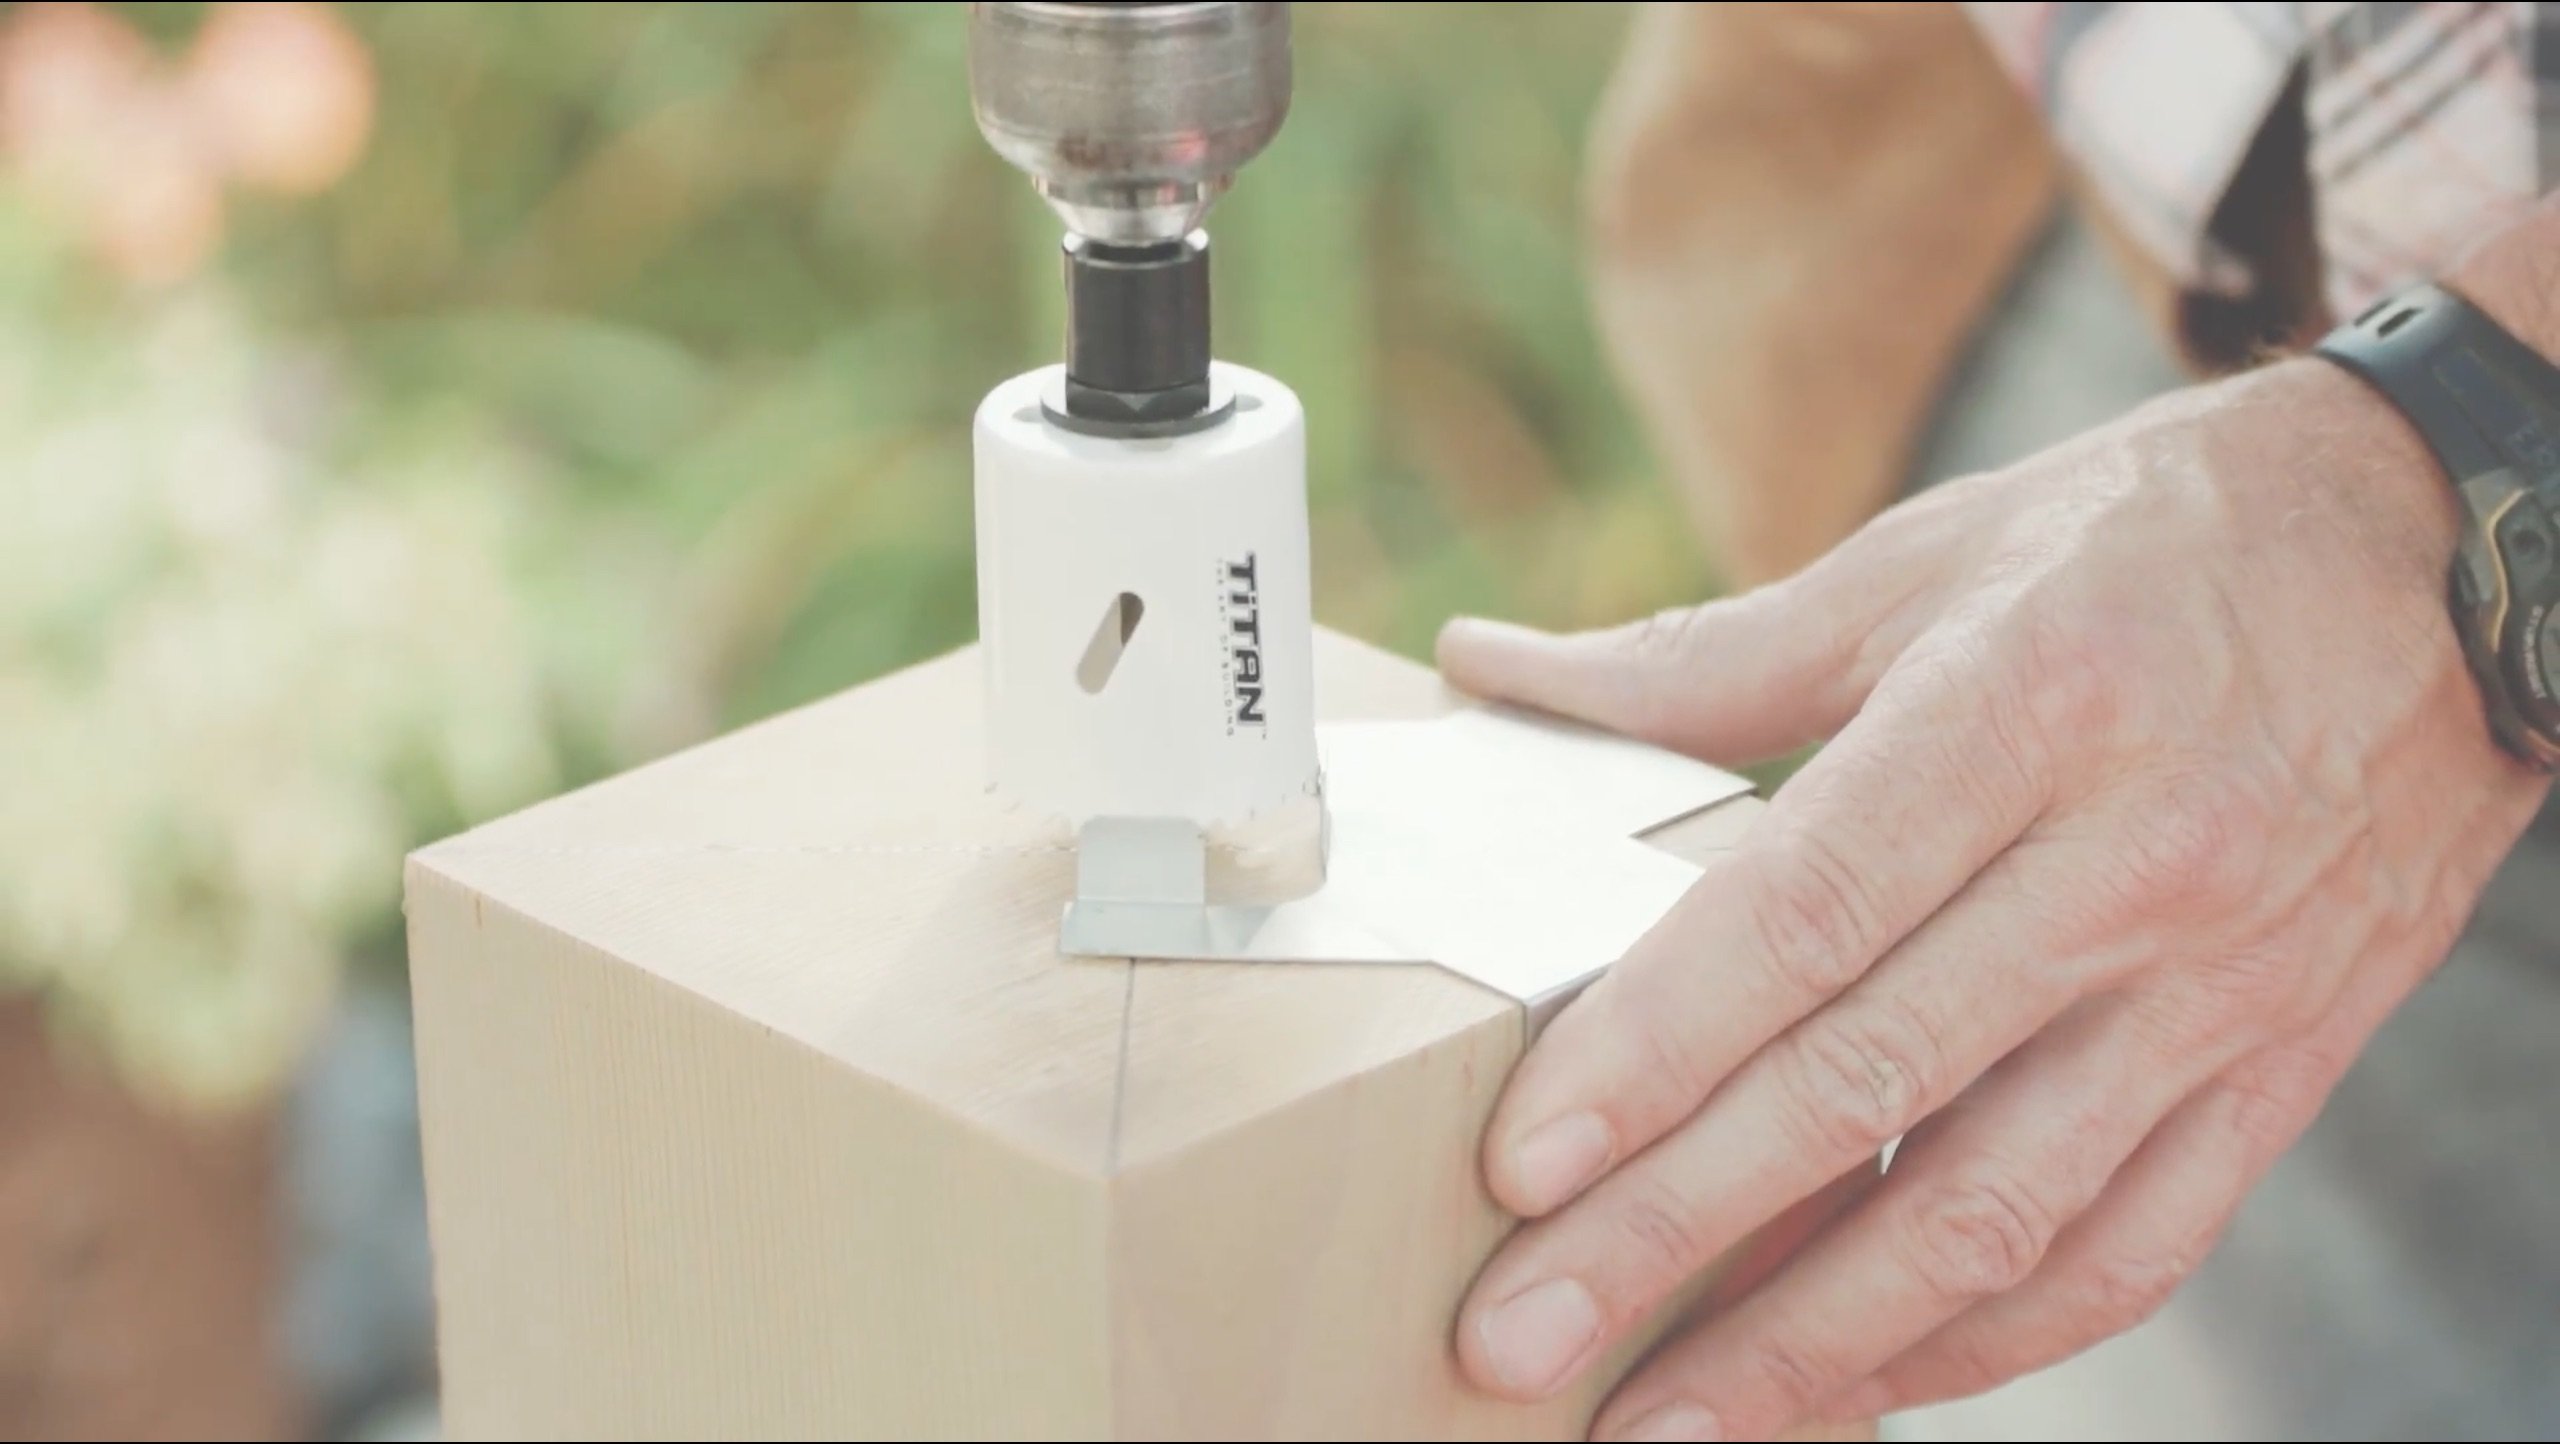
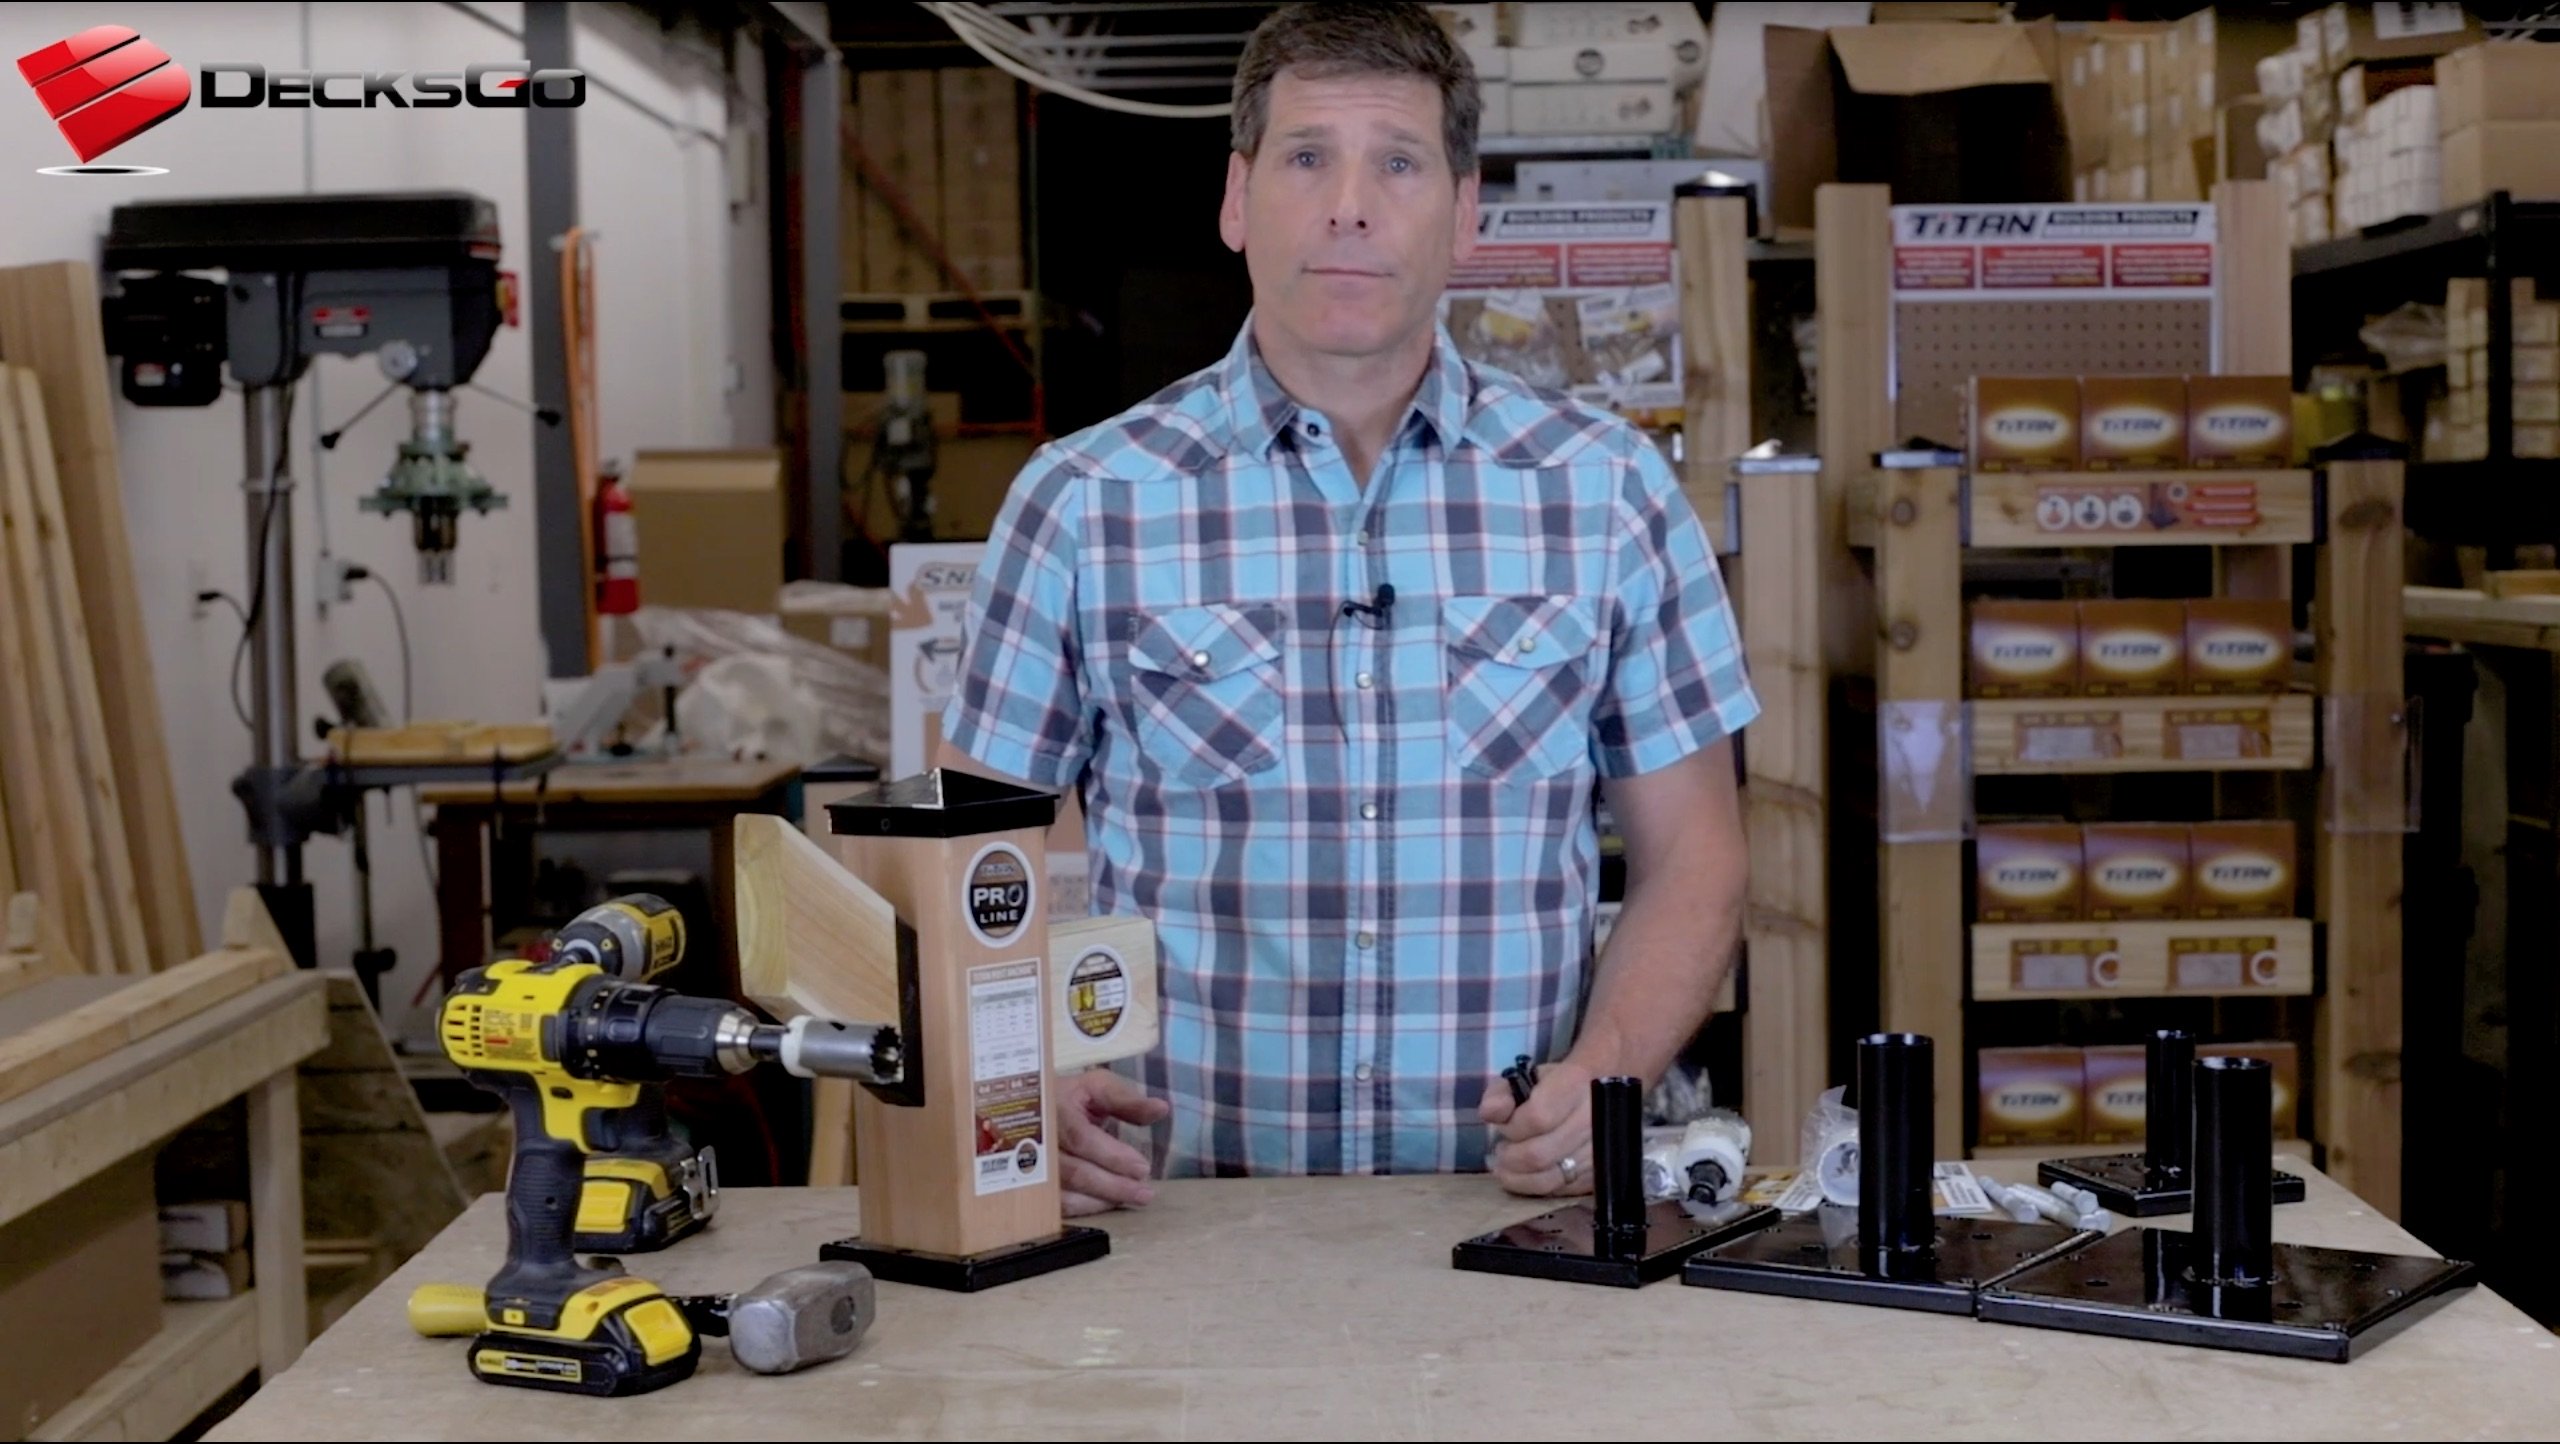
why not use a concealed post to pier connector?Any one of the above concrete deck footings could be visually improved with the "Evolution" Compression Post Base made by Titan Building Products. |
Sunken post on FootingPad® Post foundation
 |
An alternative idea for support POST FOUNDATIONSBuilding a pole barn or deck and you want to avoid using post to concrete pier hardware as in the above examples? This post footing is a great idea. Check it out. |
Five Deck Footings Styles To Support Your Deck
If using concrete, frost heave protection for a ledger connected deck is needed.
The ways of installing concrete deck footings above are best practices. Remember to always be sure that the underside of any footing is indeed below the frost line.
Forgetting to do that one simple thing can render all you hard work, time and money.
Some Other Great Reading:
Home > Building A Deck > Deck Footings


Recent Articles
-
Pergola on brick paver
Apr 05, 25 05:36 PM
I have a brick paver patio that has been in for 10 years and I would like to know if the deck anchor will penetrate the gravel/sand base -
Durability of Titan deck foot
Apr 05, 25 05:20 PM
Hi, can you advise the estimated life of a Titan Deck Foot installed in the ground? How long is it expected to last? I live in an area in Ontario Canada -
10x8 6 person spa deck
Jul 26, 22 12:17 PM
I think I might be over-engineering this but I live in CT and I'm also worried about snow weight. Adding a 8x10 deck attached to existing deck, 2x10's


It's time to start
making your memories.

How-To
Go Learn More
© 2004-2026 Decksgo.com. All Rights Reserved.