


Five ledger board techniques to secure your deck
If you are attaching your deck to a ledger board then you must know how to do it properly. There are different methods to accomplish this that are well accepted. A proper connection should be sufficiently strong and water tight. Both of these requirements are essential. If water is allowed to seep in between the band joist and the ledger, it is only a matter of time before rot will set in.
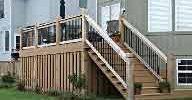
A well built deck ledger board connection

The Two Reasons Why a Deck Collapses
The two main reasons a deck collapses are improper fastening or connection means and water damage causing structural weakness.
Although very rare, decks have fallen to the ground. However, this will never happen to you, because if you study and follow these diagrams faithfully you will build your deck properly.
1/2" Lag screws

This is a side view of the perspective diagram above.
It is one of the most common ways of connecting the ledger to the band board. In this instance, minimum 1/2" lags are staggered along the length of the board. The lags should pass through by at least 1/2" on the back side of the band board.
Note: The deck boards have been depicted with a gap between the first board and the house only to emphasize flashing overlapping the ledger. On site the first board would be positioned within 1/2" from the wall flashing.
1/2" carriage or cap bolts

In this second method, 1/2" through bolts are used to anchor the band board and ledger together.
This configuration requires access from the basement between the floor joists in order to install the washers and nuts.
Band boards must be solid sawn 2x (1-1/2") dimensional lumber or minimum 1" engineered wood product (EWP).
Pre-drill holes 17/32" to 9/16" diameter.
This is slightly larger than the bolt itself and relieves pressure and or tension in the boards. The predominant forces in the system will be the tension forces against the upper bolt.
Wood frame with spacer

The third connection method uses a maximum 1/2" space between the exterior sheathing and the ledger.
In this diagram the space is created using a 1/2" stack of washers. Just be sure to verify that this stacking method is permitted in your area.
Double layers of metal flashing create a dry air space between the house and the board with plenty of air to circulate further protecting the materials and ensuring maximum longevity. Consider this method especially if you live in wet climate zone.
concrete foundation wall

The fourth technique involves securing the ledger to a concrete foundation wall rather than to the first floor band board. One of the benefits of this method is that more rigid minimum and maximum lag screw location configurations associated with mounting to band joists can be avoided.
Then the deck can be set as much as 7-3/4" below the top of the door sill.
This is very desirable in areas with snow or wet climates, as it provides an additional level of protection from water entering the home.
Either expansion bolts or epoxy can be used in this scenario.
For a really durable job, consider applying 30# felt paper or metal flashing between the ledger and the concrete.
If metal flashing is used, holes must be drilled through the metal prior to drilling out the concrete. Although more work it is absolutely a bullet proof solution.
Cinder block wall

The fifth ledger board technique involves mounting to a cinder block foundation.
Cinder blocks are not as common in residential construction today as they were years ago and because they are hollow connecting a deck to them requires special attention.
The hollow core inside the blocks must be filled with concrete so that bolts and epoxy have material to be set into. Also, be sure to caulk between the first board and the cinder wall.
five ledger board techniques explained and illustrated
Any one of these five ledger connection methods, properly installed, will give you a reliable, long lasting deck that is secure. This is a time consuming process and should be done while the house is being constructed to simplify the process and reduce costs.
Installing a ledger connection to a house after it is constructed is a major job. It is certainly not a job for a weekend carpenter or DIY'er. It gets complicated in a hurry.
Just imagine having to remove courses of masonry, or lap board siding and then precisely locate the band board accurately to avoid damaging the wrong part of the siding. You may decide that a free standing deck or floating deck is a simpler less expensive, less complicated option. To learn more about solutions for free standing decks read this article.
Home > Building A Deck > Deck Building Code > Five Ledger Board Techniques


Recent Articles
-
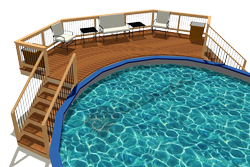
10x8 6 person spa deck
Jul 26, 22 12:17 PM
I think I might be over-engineering this but I live in CT and I'm also worried about snow weight. Adding a 8x10 deck attached to existing deck, 2x10's -
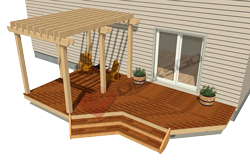
Hot tub weight
Jul 26, 22 12:16 PM
 I won an inflatable 6 person inter hot tub. I have a large deck. 12x 20 on both sides of the house. With a header to the house and the deck was built 6
 -
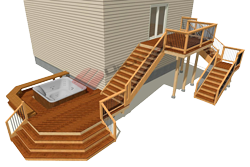
Deck around a swim spa
Jul 26, 22 12:15 PM
I'm putting a swim spa into an inground concrete bunker and will build a deck around it. I have been advised to keep the deck joists a minimum of 6 inches


It's time to start
making your memories.

How-To
Go Learn More
© 2004-2022 Decksgo.com. All Rights Reserved.