


Building a pergola & Deck with Titan post anchors, snap'n lock Balusters & deck foot anchors
How one family decided to improve their backyard with a pergola and deck rebuild
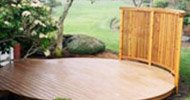
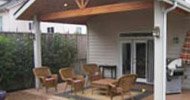
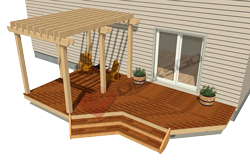
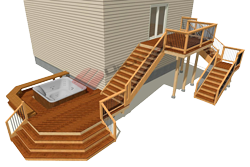
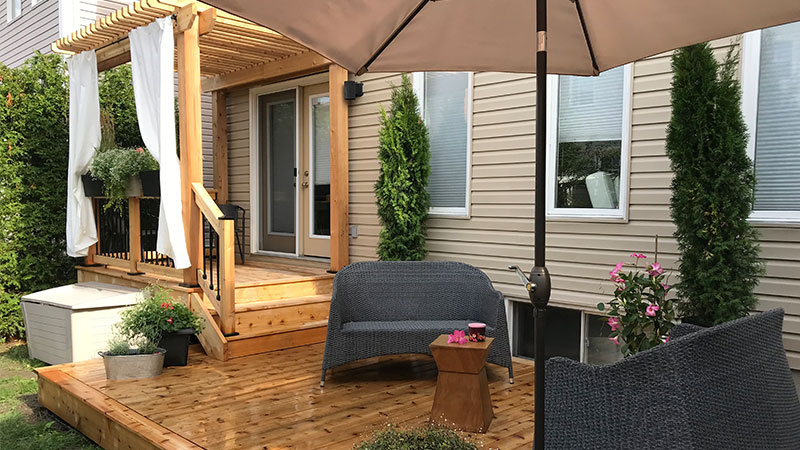
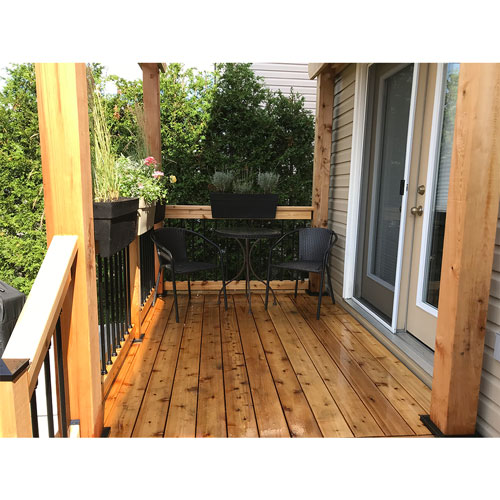
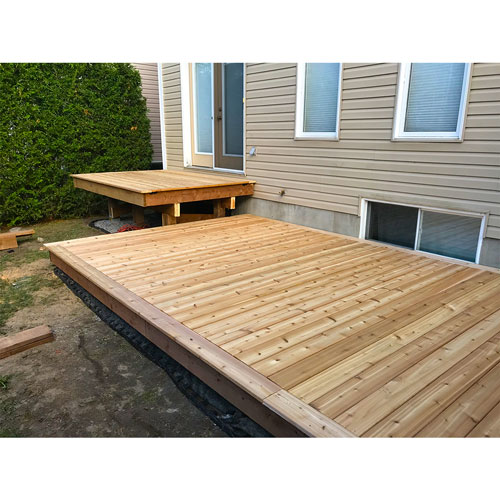
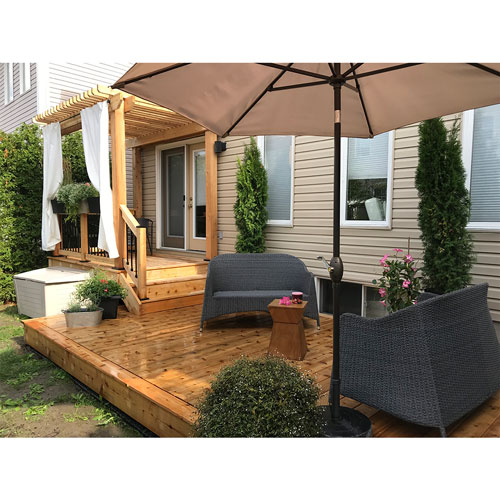
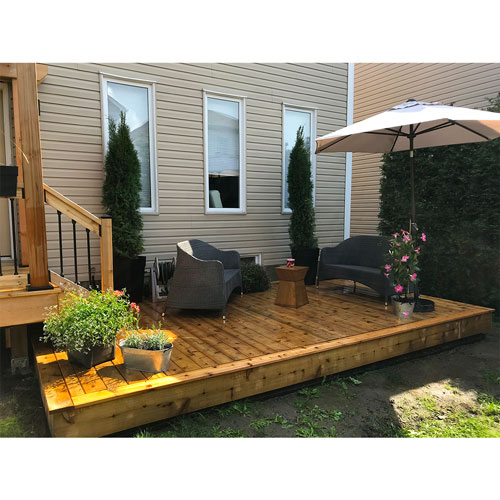
This deck with a railing and pergola coming off the patio doors is a huge improvement from the simple 4'x6' wood porch with 2x2 picket railings the original builder gave them when they bought their new home ten years ago.
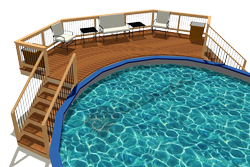
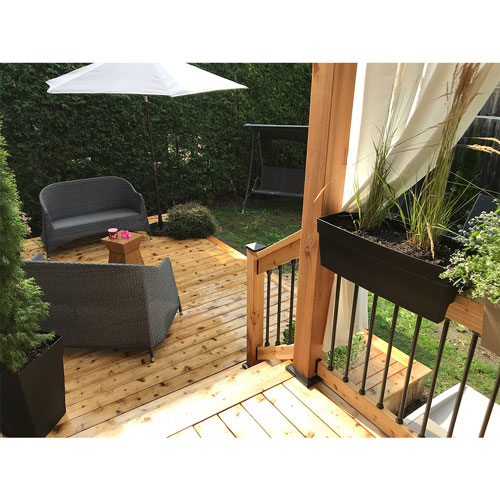
Now they have a private area with shade from the pergola leading down to an open lower deck for relaxing and entertaining with family and friends.
This project went up quickly and is built to last because it was built with products from Titan Building Products. Their deck building hardware and tool solutions are simple to use and specifically designed to keep the wood elements drier and less susceptible to rot.
about the builder

Alex Gauthier is an enthusiastic up and coming builder from Ottawa. He enjoys taking on new challenges and building indoor and outdoor renovations of all kinds.
looking for ways to standout among other builders
Alex strives to be efficient in order to deliver a well built, long lasting, product that keeps his labor costs and budget tight and most importantly his customers happy!
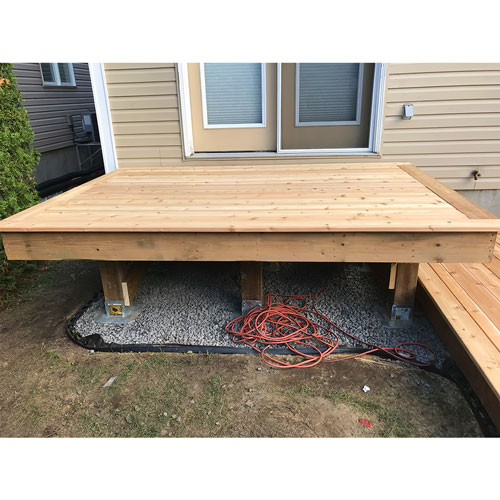
One of his secrets to building a simple low-level deck like this is to use the Deck Foot Anchor and make both decks floating - or free standing.
This saves him a couple days of a labor by avoiding complicated ledger connections and easily saves his customer a $1000 or more.
PREPARING the site & FOOTINGs
Alex quickly removed the old porch which was secured to the concrete foundation with steel brackets. All sod was removed using a rented sod cutter.
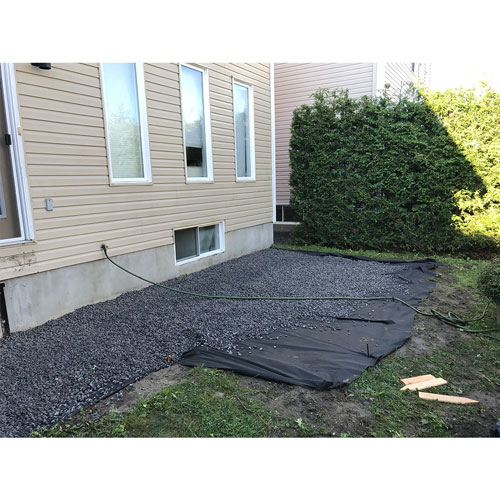
Geotextile landscape fabric was laid down along the outline of the deck.
Next, gravel (½" minus) was put on top of the fabric, raked smooth and leveled.
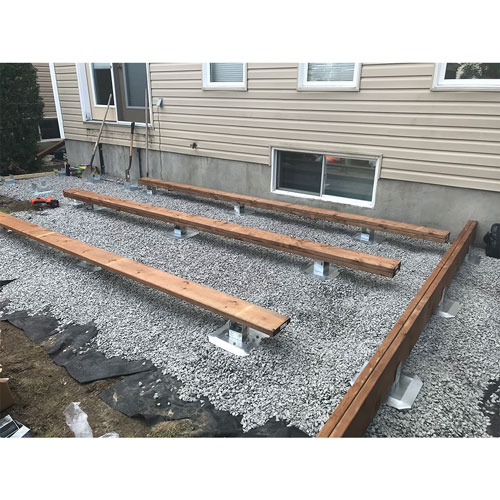
All footing locations were marked, and an 'X' was cut in the fabric for the auger to clear. Beams for a small upper deck were set parallel to the house. Beams for the lower deck were run perpendicularly to the house.
Since the site was essentially level, each footing was very close to level with each other. In cases where the elevation varied, shims were placed under the beam to ensure all beams were level to each other.

tips for low ground level decks
This larger low-level deck was intended to be as close to the grade as possible. So, the double 2x8 beams were set into the post bracket of the footing rather than a post with the beam resting on the post.
To do this, requires having a site that is reasonably level over the entire area because shims are only useful for addressing modest elevation variances.
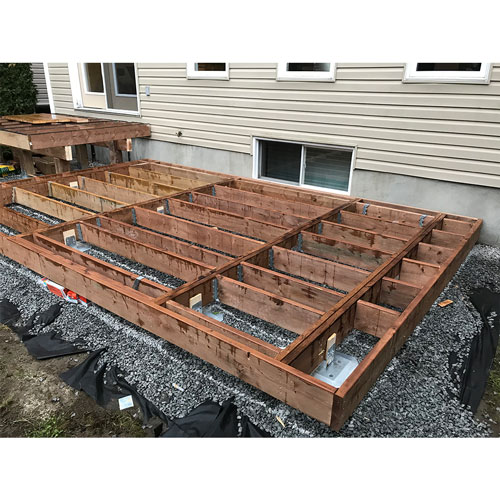
framing the deck
The joists in the lower deck were secured to each beam with joist hangers to achieve a flush finish. This reduced the height of the entire deck frame by 7-½" (a 2x8). This technique allows the deck frame to sit very low to the grade (as little as 2" above grade).
This takes more time and attention than just resting a frame on beams but was the perfect and subtle design feature that made this backyard look so good.
Notice that the front and back rim joists extend past the last beam by about 18". The blocking fills the joist bay, and the deck now hides the outermost footings creating a floating look.
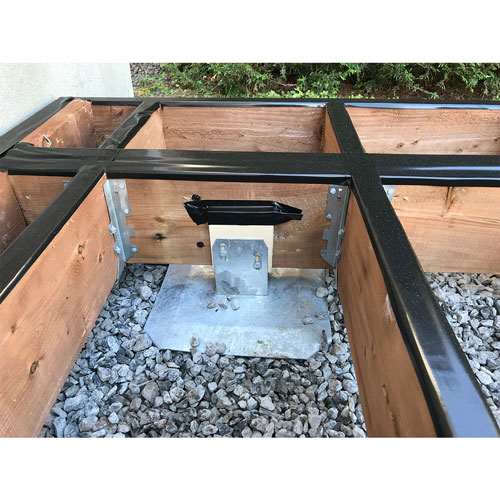
Joist tape was used to protect the structure from the wet snowy Ontario winters. It was also applied around the beam sitting in the post bracket where it is always dark and generally takes longer to dry after wet periods.
That lighter colored board is a ½" plywood spacer to fill the gap between the post bracket and beam.
There are lots of tapes available that work well. Alex used a product called G-Tape which works well in all climates and is very clean, easy to tear and handle.

BUILT IN ERROR PROTECTION WITH THE NEW LATERAL SLIDE APERTURE

The new lateral slide feature in the Deck Foot Anchor allows the post saddle to move up to 2-½" laterally in case you are not able to drive the anchor down in the exact location you wanted. This also comes in handy when you want to set a beam directly on the saddle supported by three or more footings.
installing deck boards
To do this right, you should know exactly the number of deck boards needed, their width and the spacing between each board (ideally 3/16").
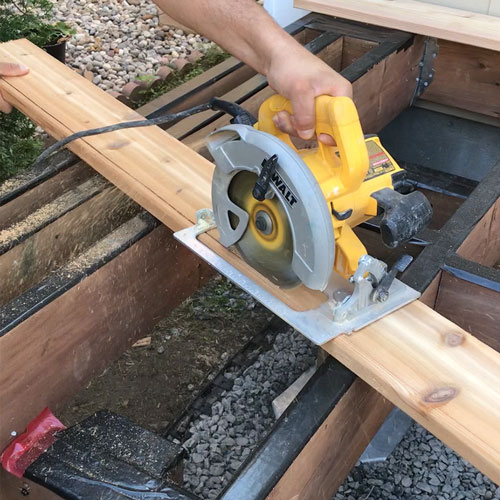
From that number subtract the overhang from the fascia and then you can determine the width and length of the frame.
To learn more about this check out our article by Richard Barnett of Ottawa, Illinois

You can see how Alex used another technique to prevent water from collecting and dripping down the fascia which often creates ugly stains and discoloration over time.
He smartly ripped a ¼" deep about ½" away from the edge of the first deck board. For an extra ten minutes of effort, this will help keep water from hugging the underside of the decking and dripping down the fascia and a better-looking product for the long haul.
For a more detailed discussion about how to do this read this article on decking and fascia tips.
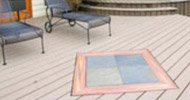
Picture Framing the infield boards
Both decks were framed, and the decking was installed using a toe-nail screw technique for a hidden fastener appearance. The look of this new deck is now starting to come together, and you can almost feel it!
Look closely and you can see the attention Alex put into the way he installed the decking to create a picture frame look.
Picture framing of deck boards is a very nice way to tidy up any deck, but you often see mitered corners to frame the decking.
The problem with using wood decking for mitered corners is the variance in shrink rates across the width and the length of a board. You often see a gap growing between the two boards at the inside corner.
So, to address this concern Alex used a butt joint technique to picture frame this deck. And the look is beautiful and there is no need to worry about the joints separating over time.
The pergola takes shape
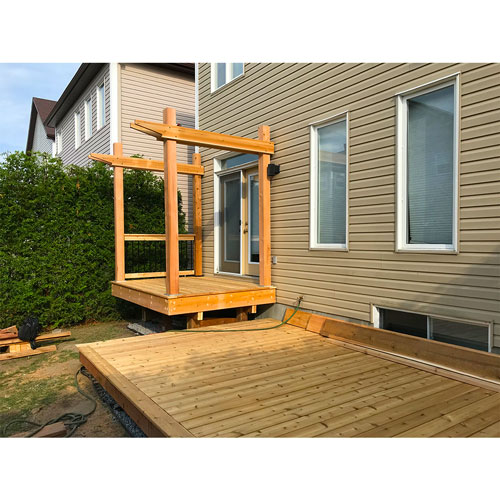
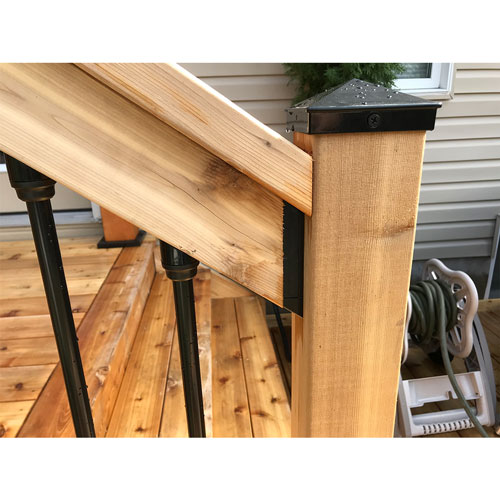
The posts for this pergola were surface mounted to the deck using Titan Wood Post Anchors with blocking between the joists under the decking.
A simple but elegant design was used for the 2x8 beams, 2x4 vertical joists.
Alex chose 2x4s to lighten the appearance of the top of the roof in general. He placed the 2x4s closer together to allow just the right amount of direct light versus shade for this site's exposure to the sun. Using 2x6s as the joists would have made this pergola look a bit too tall and top heavy.
We think the balance is just right.
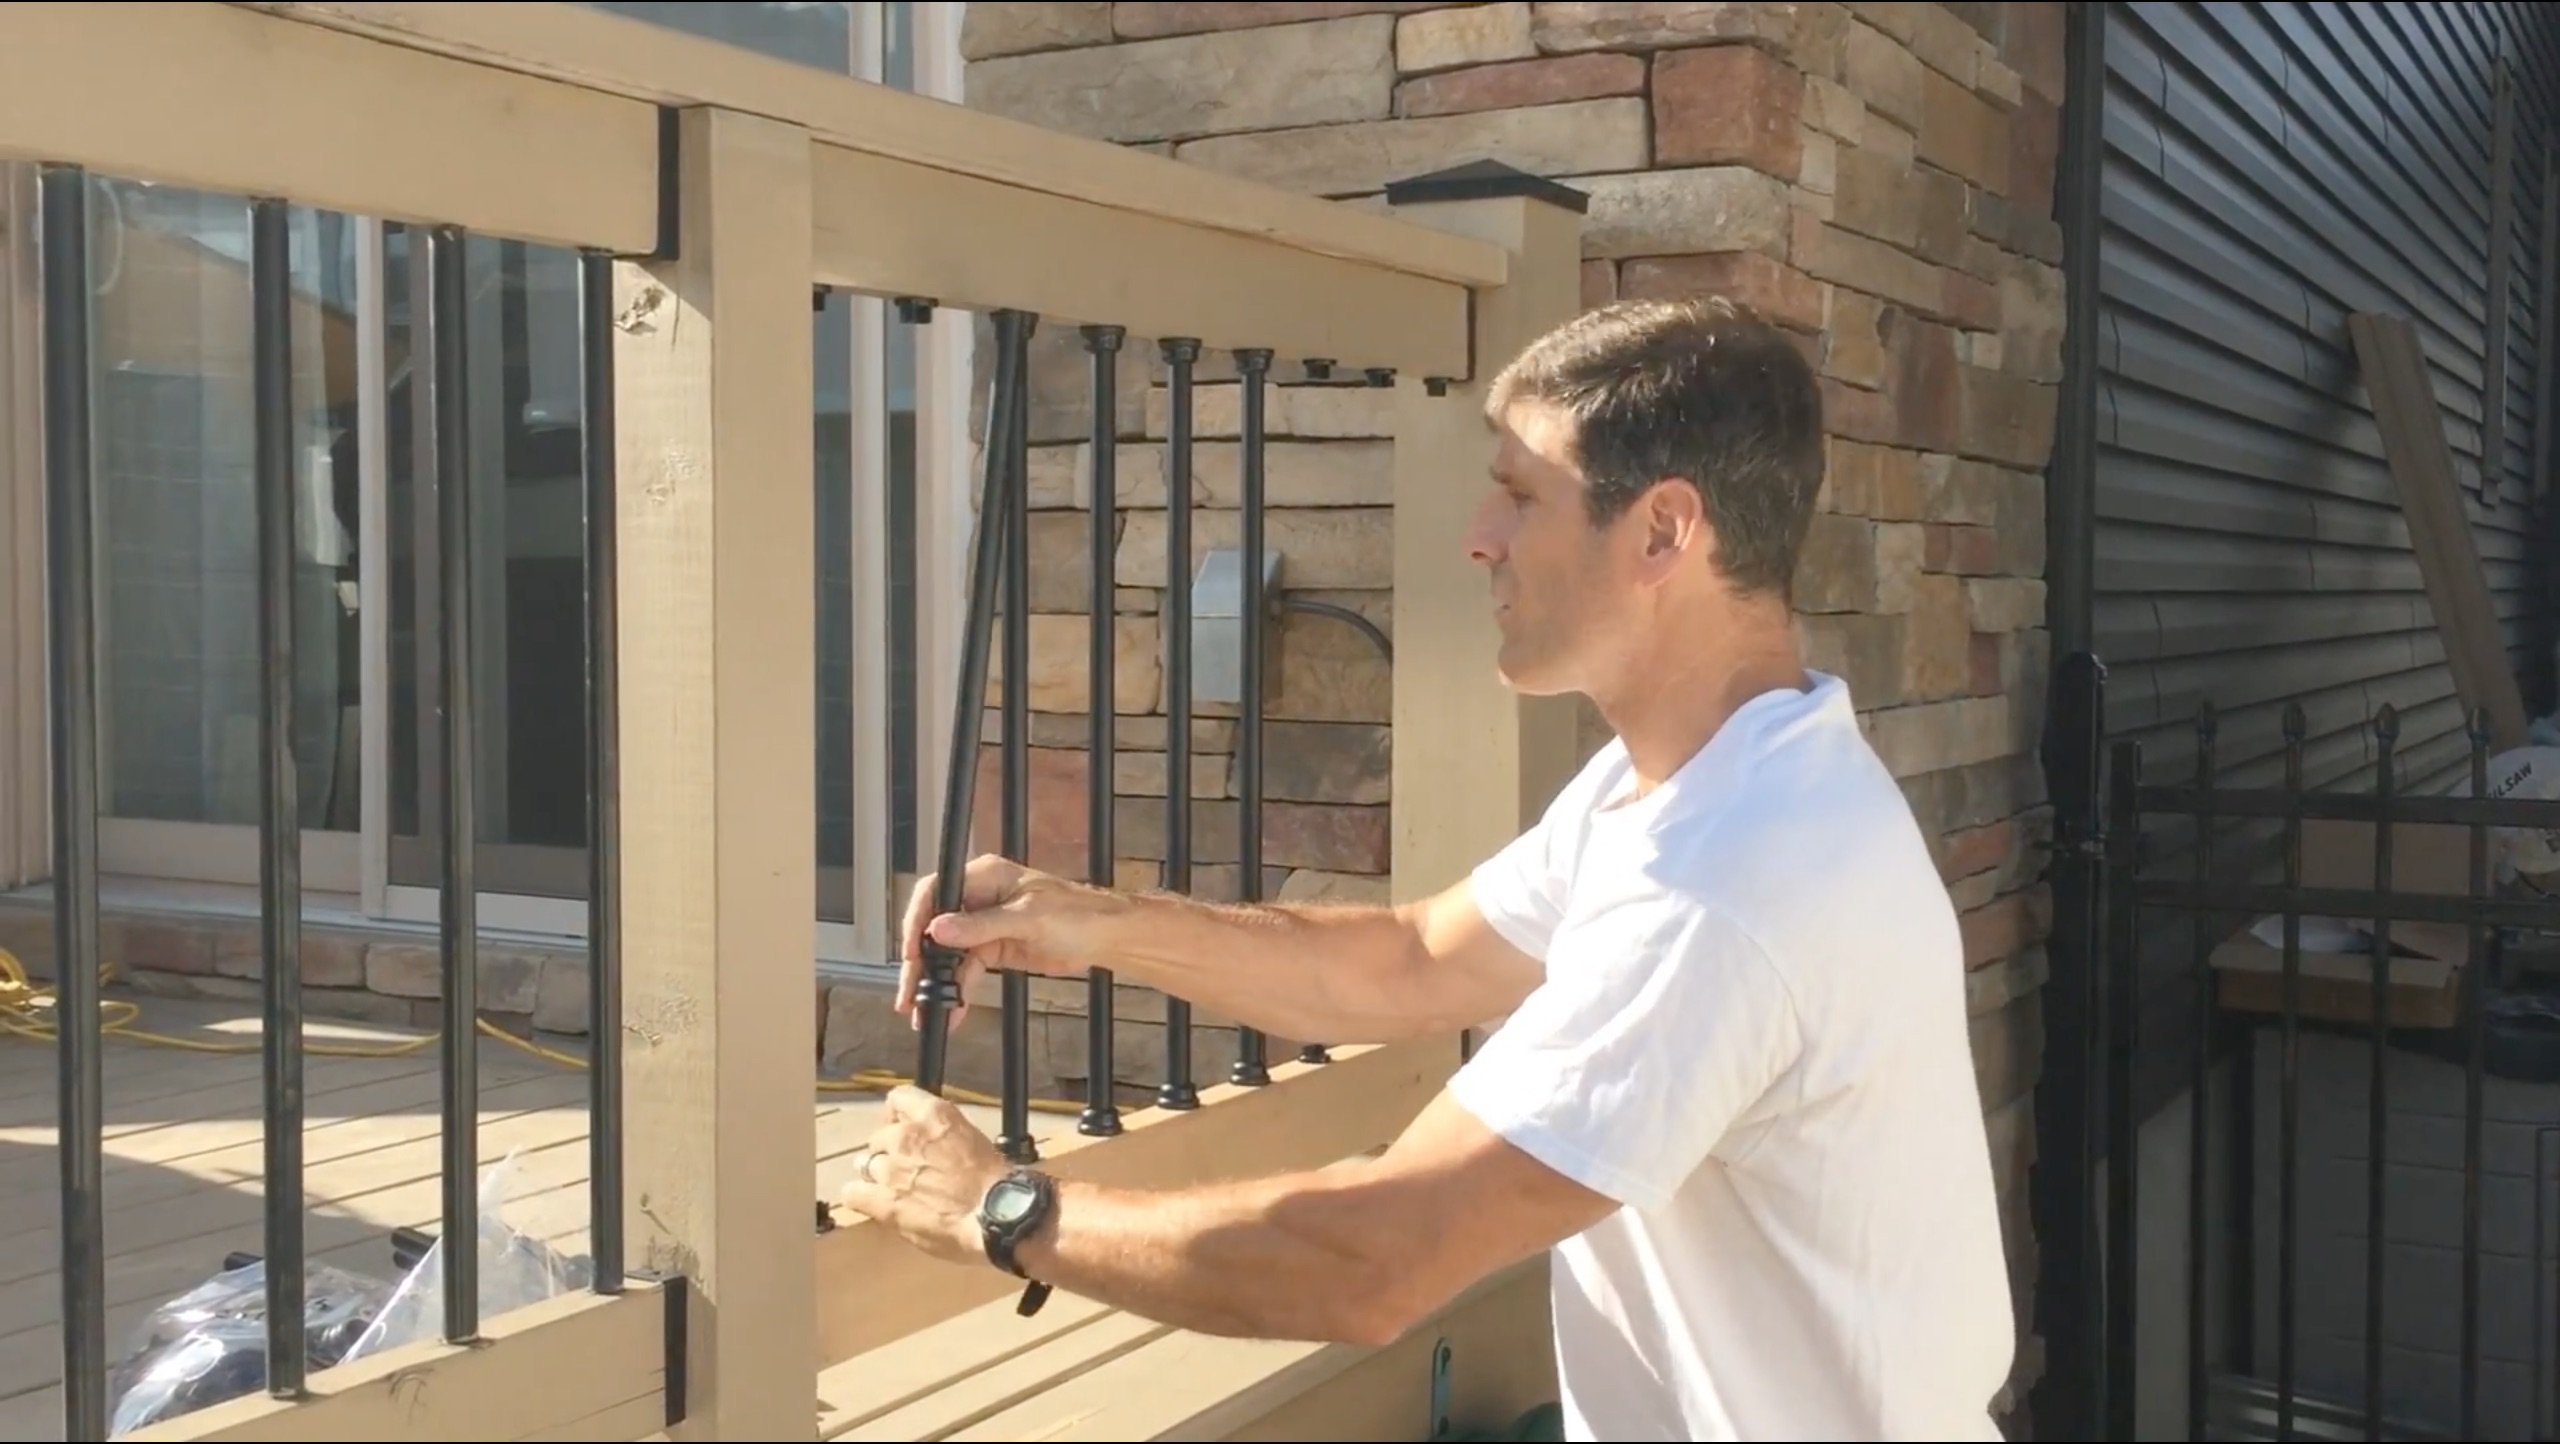
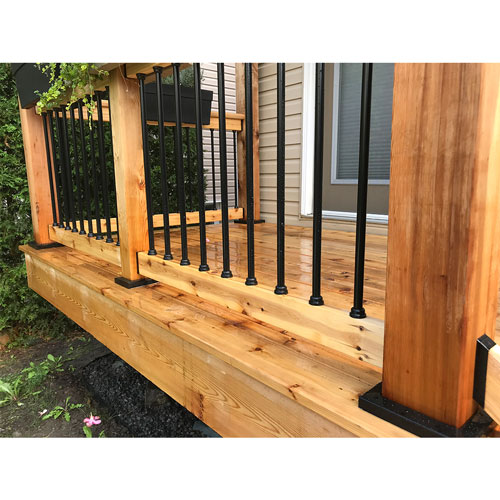
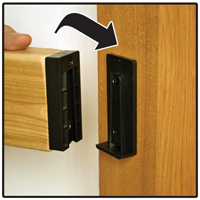
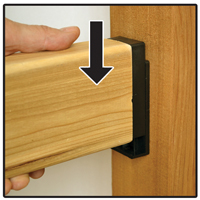
installing The snap'n lock baluster system
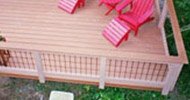
Snap'n Lock Balusters™ were used for the infill of this deck railing. They install sideways and snap and lock in place. They are so much faster and easier to use than the plug style alternatives. Plus, they are both stout and elegant at the same time. People are raving about the Snap'n Lock system.
This was a 36" guard rail, so the 25" length balusters were used. The upper and lower 2x4 rails had a 25-½" gap for the connector bases. A flat 2x4 cap rail (drink rail) was installed on top. Although not required, the posts were finished with clean two piece snap fit galvanized metal post skirts.
HERE IS HOW They WORK
 |
Using Snap'n Lock Balusters is as simple as... Screw, Snap, and Lock
But not only is it fast to install, it's also fast and easy to uninstall. And this is a huge benefit when it comes time for maintenance with a wood railing. To learn more about the Snap'n Lock Baluster system download our free eguide. |

discover shadow rail 2x4 connectors
With the Shadow Rail Connector, you can enjoy the full beauty of a wood deck railing with the most elegant looking 2x4 rail to post connection there is.
And better yet, it doesn't matter who you are.

DIY'ers with minimal skill or PROs with years of expertise can achieve amazing results, faster and easier than ever.
Take the focus off bulky crude connectors and fasteners and show off the clean lines and beauty of your railing - fastener free!
SIMPLICITY: HERE IS HOW THE SHADOW RAIL CONNECTOR™ WORKS
SLIDE
LOCK
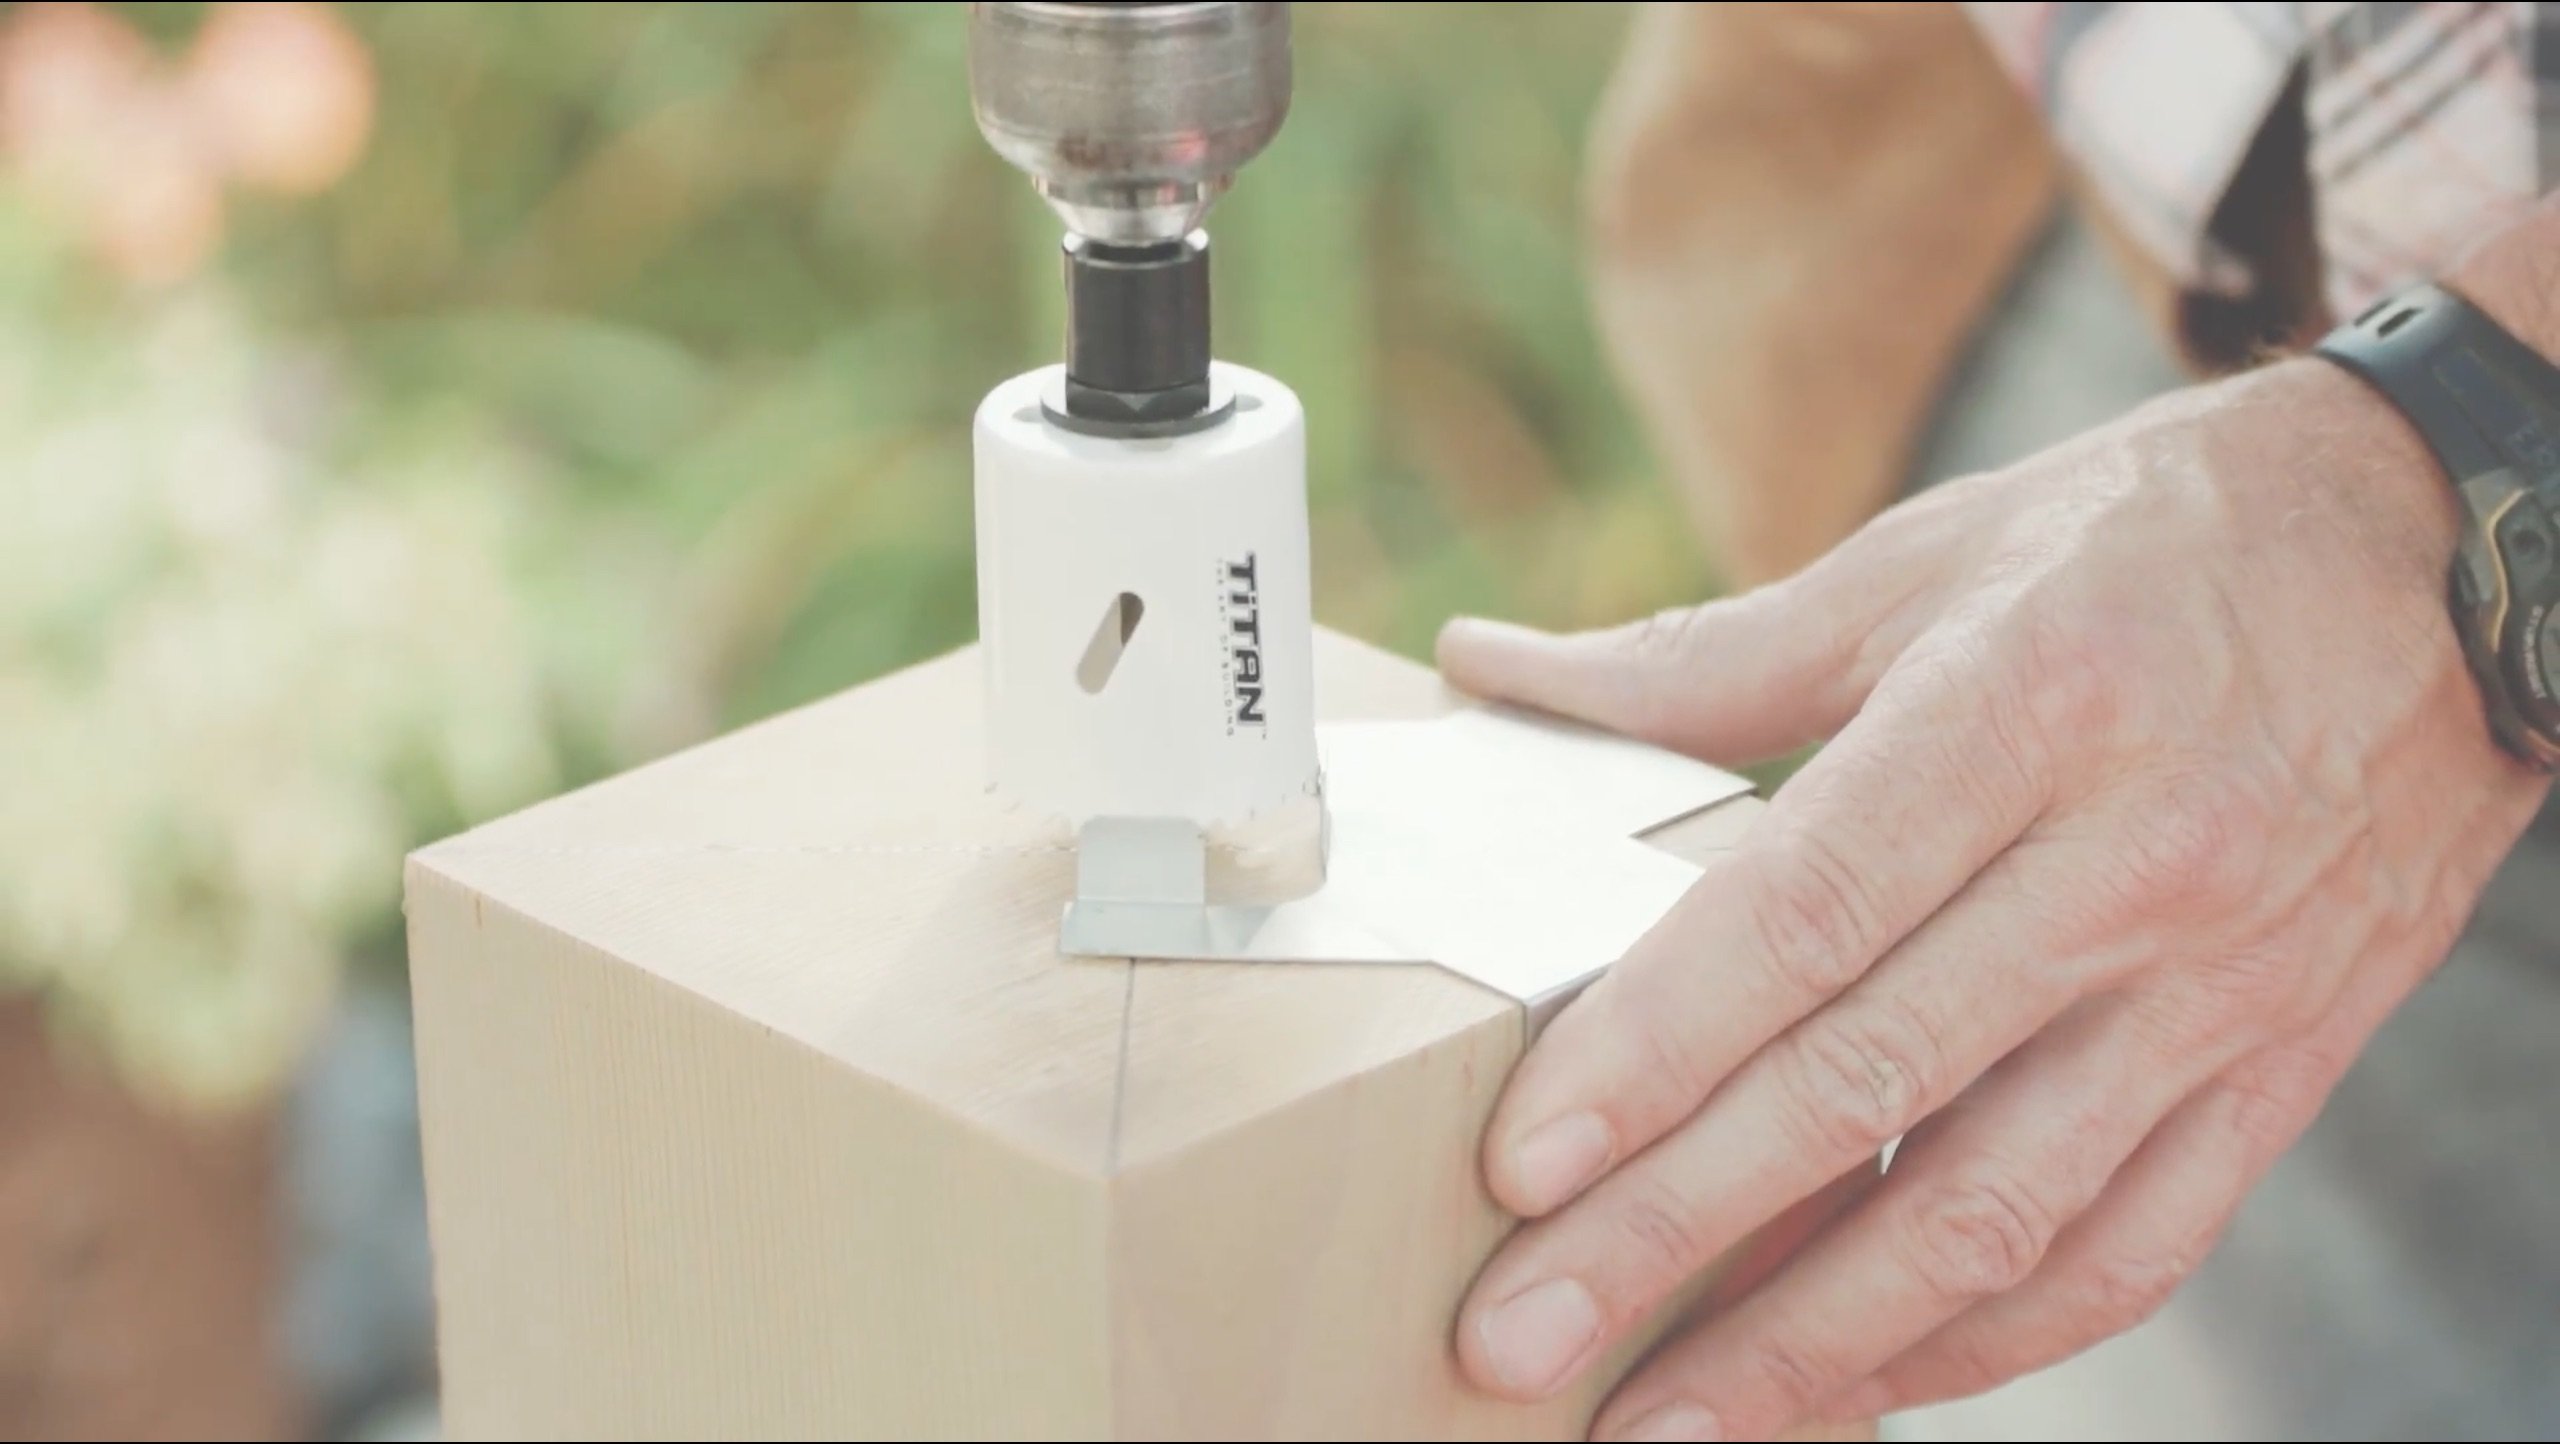
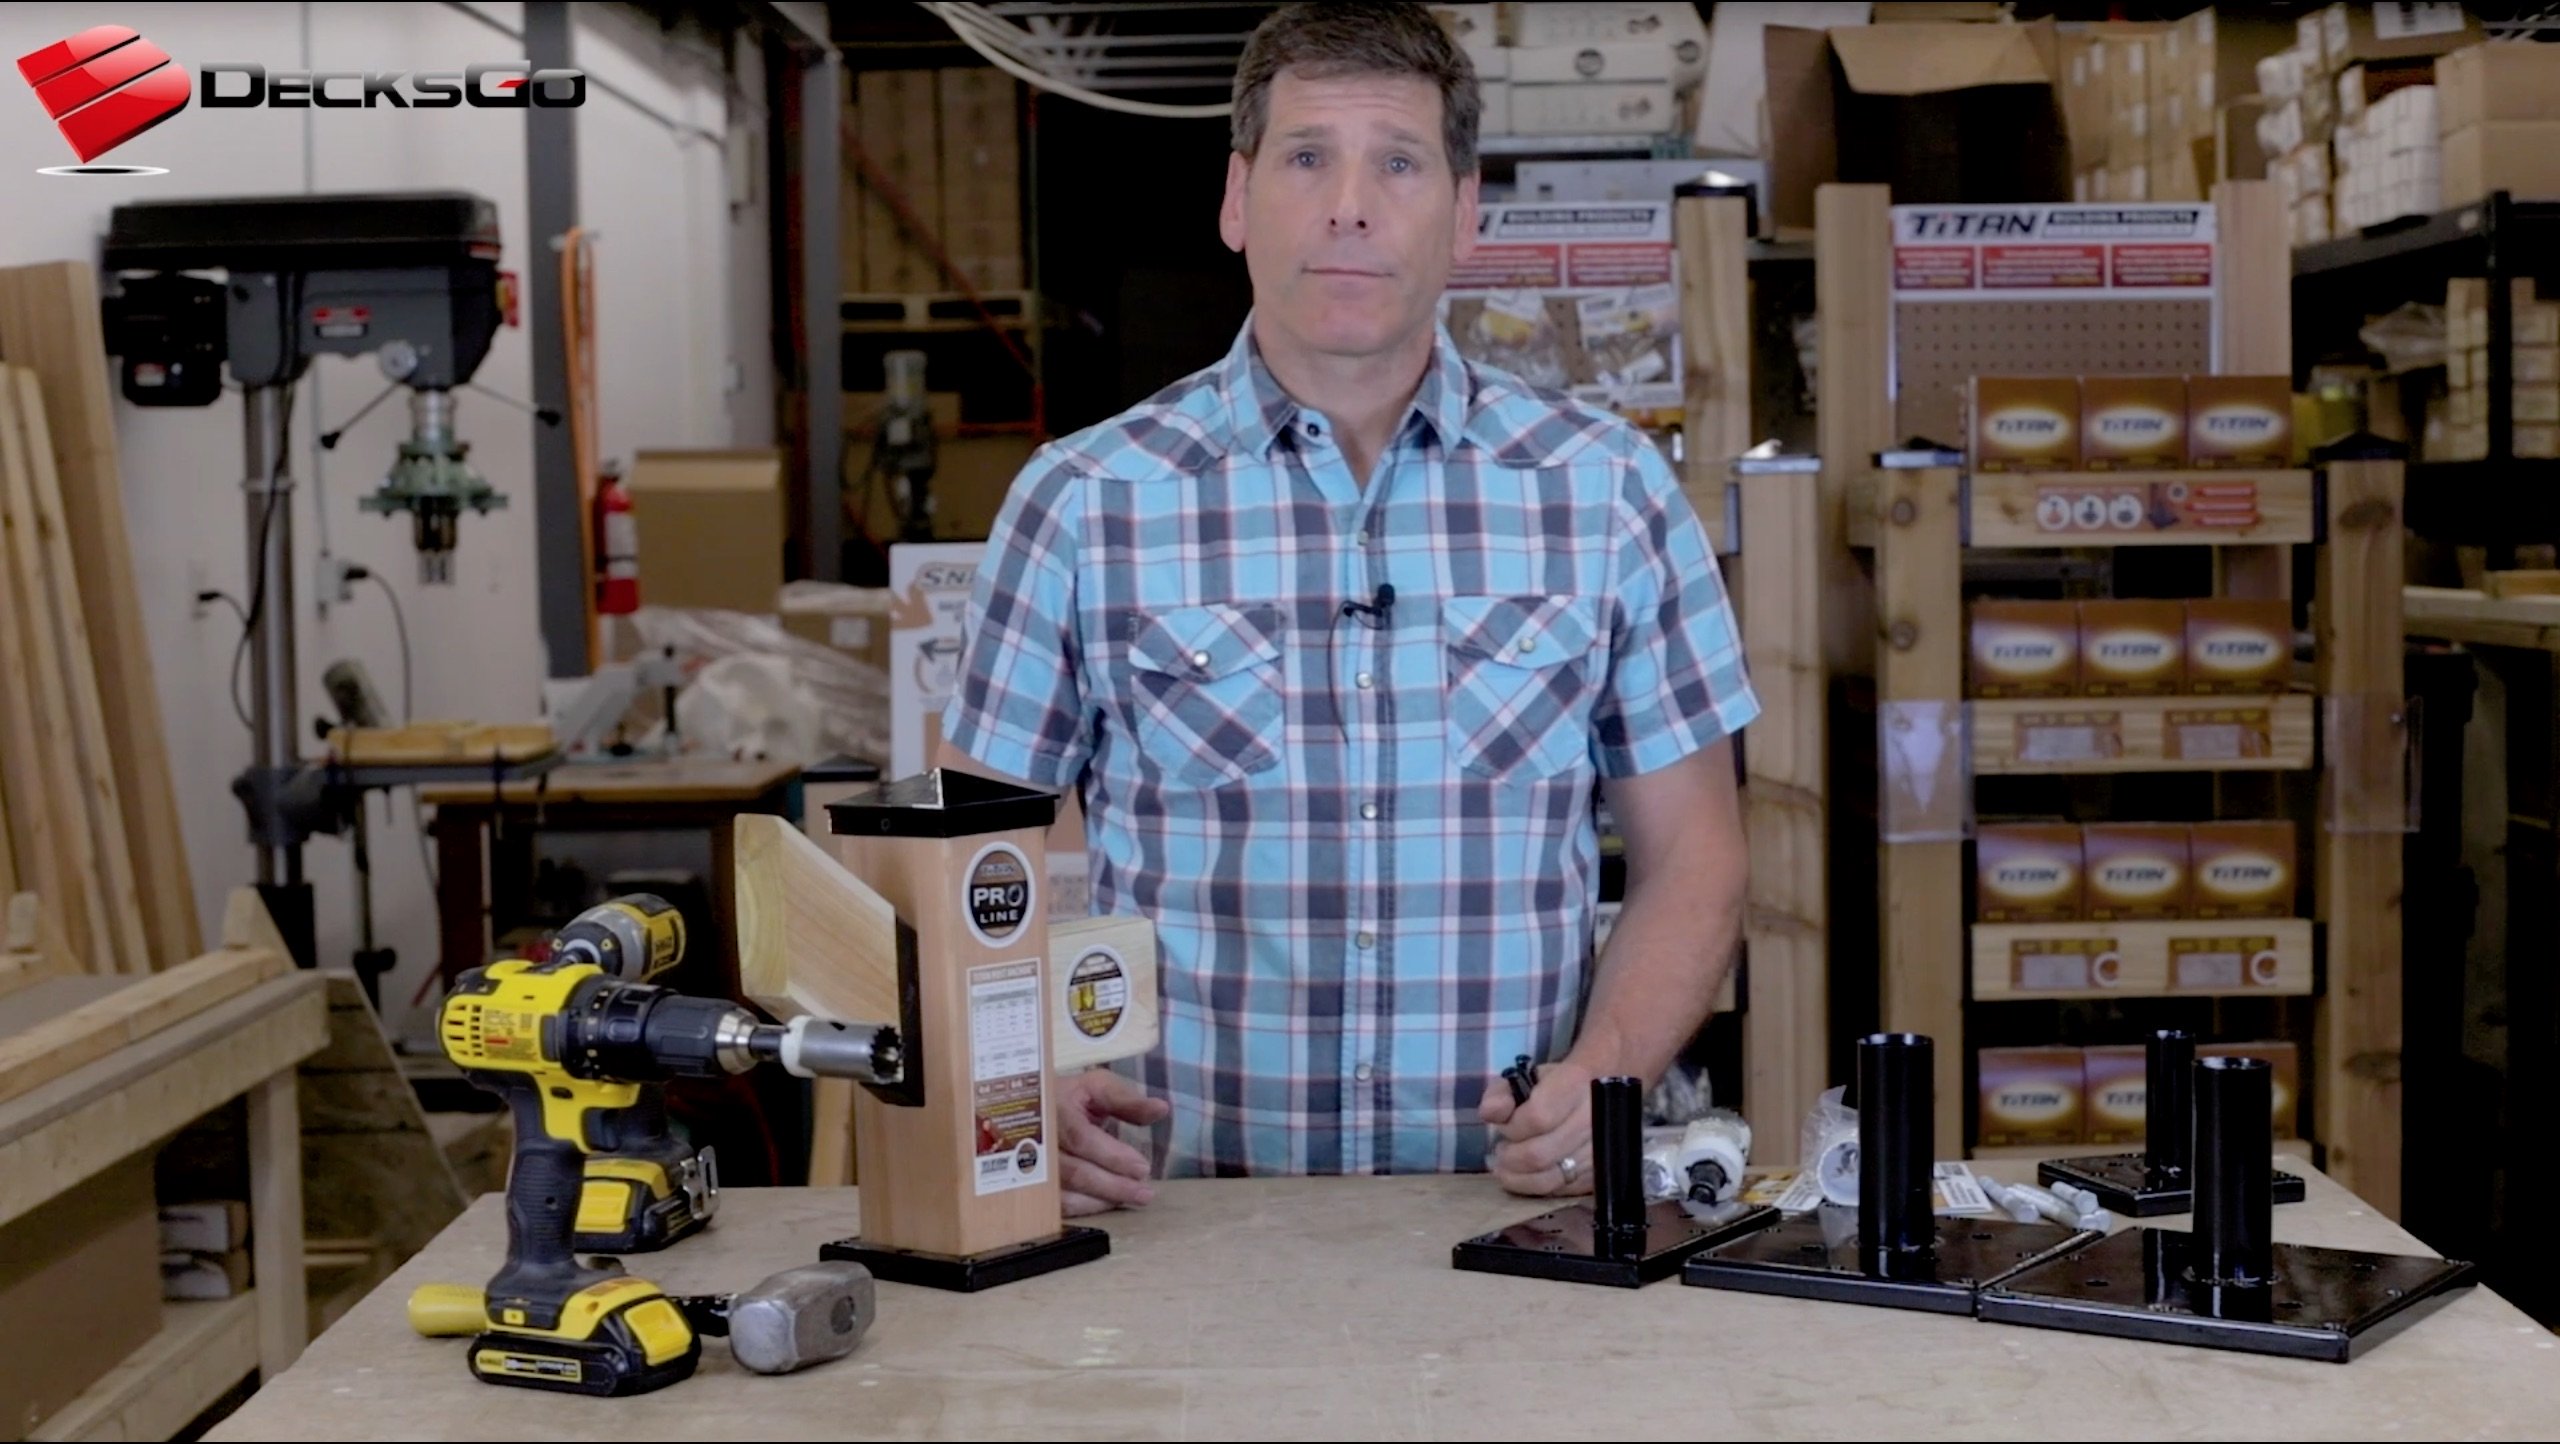
A BETTER LOOKING, EASY TO INSTALL WOOD POST ANCHOR SOLUTION THAT's engineered for residential jobs
The Titan Post Anchor™ will make your life a whole lot easier. It's the first low visibility surface mount post anchor that any beginner can install with minimal skill - with both cost and time savings any builder will love.
HOW IT WORKS

DRILL
Use an off the shelf 1-1/4"x2" hole saw to cut a pilot cut for the tube.
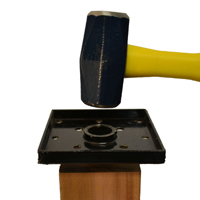
DRIVE
Use a 3 lb mini sledge to drive the tube into the post beyond depth of hole saw cut.
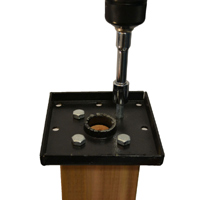
FASTEN
Pre-drill holes and drive in lag screws.

the big reveal

BEFORE
AFTER
you can do this too
We love featuring real customer's projects and appreciate the time it takes for them to share their experience with us. Feeling excited? You should be...you can do this too!

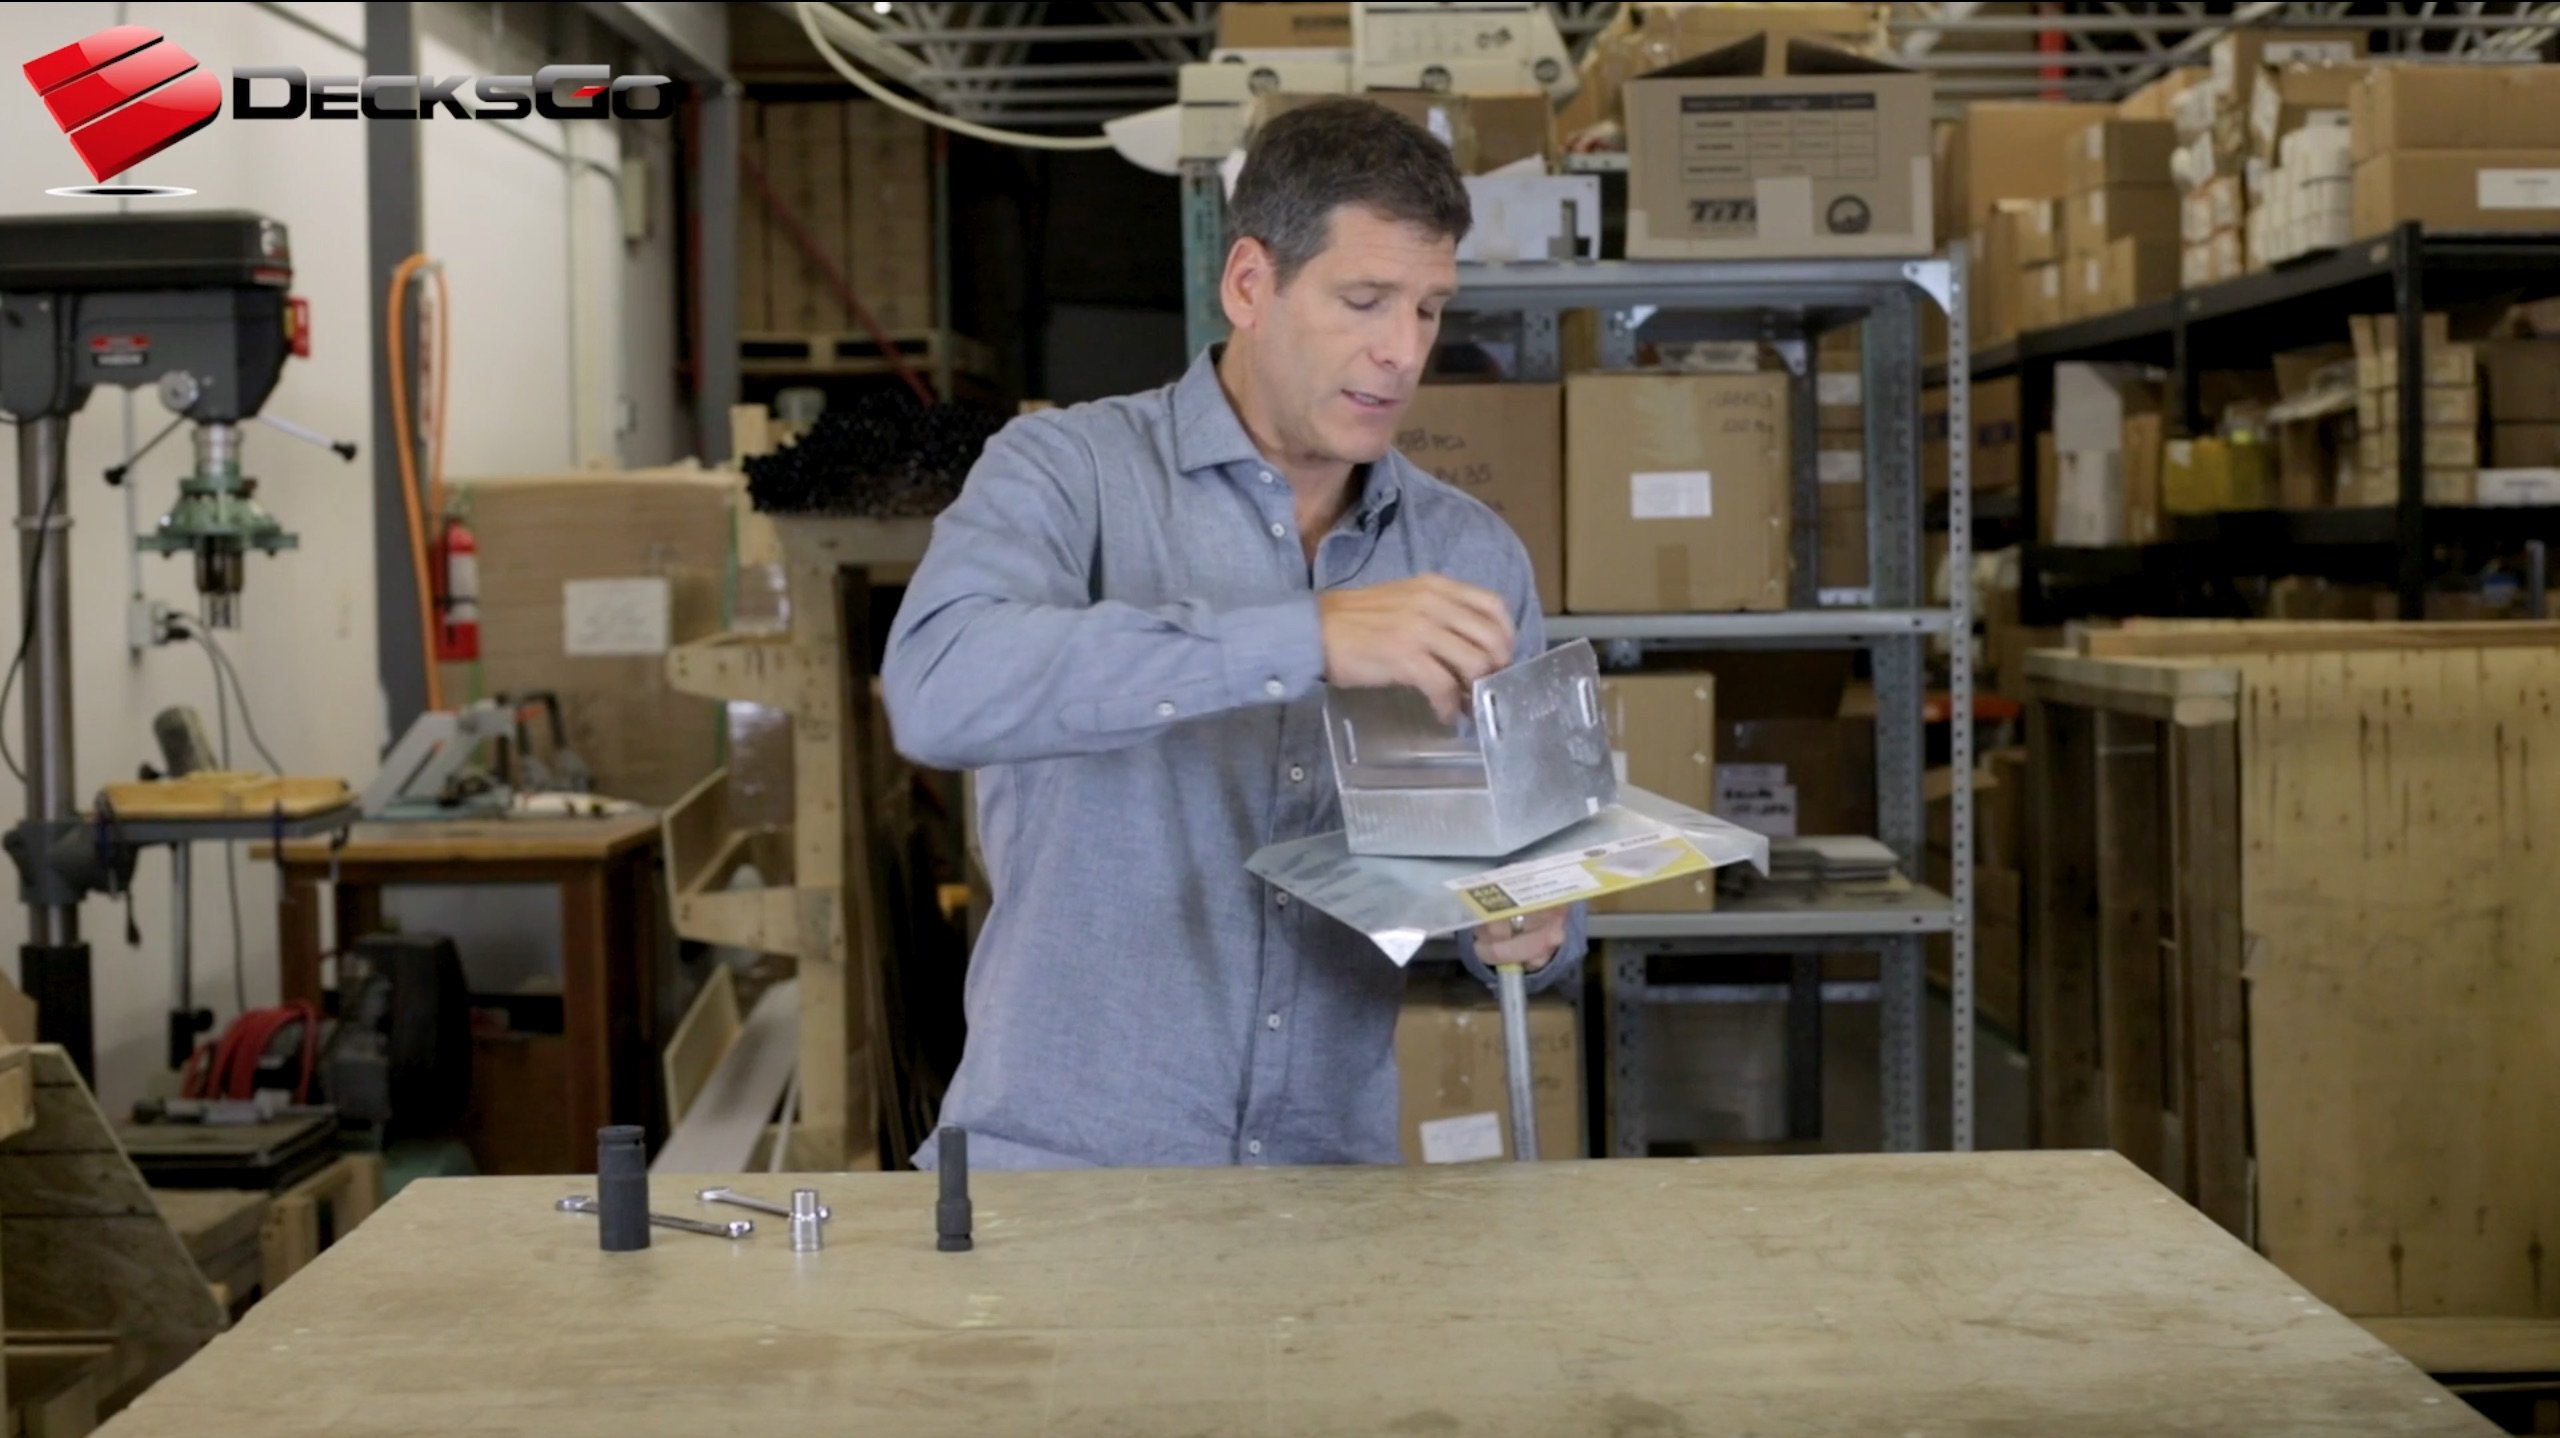
The Snap'n Lock Balusters™, Titan Wood Post Anchor, Titan Deck Foot Anchor are DecksGo Recommended Products. They are the ones that we are confident you will be happy with.
DecksGo was the first company to bring this product to the market and you can expect greater "first" moments like this.
This is what we do - try to bring you leading edge building solutions before anyone else.
- Home
- Deck Foot Forum
- Building a Pergola
WHAT PEOPLE SAY
Fantastic Product!
Your product is fantastic I had about 5 of my neighbors just in awe of your deck feet when I was installing them yesterday. Hardest thing was to prep and level the ground before drilling these 6 deck feet in. Honestly installed six of the 6x6 Titan Deck Feet in about 20 minutes. My wife even said this is very cool.
Used my 1/2" impact wrench and it went down very straight and easy even in very thick clay soil. Honestly one of the best products I have seen. The new direct drive top on the post anchor is ingenious to say the least you can put it down and take it back up with no issues. 10 out of 10.
K. Bacchus - Toronto, ON
I'm A Believer
I built a deck for my son earlier this summer in Columbus, Ohio using your Deck Foot product. I LOVE the Titan Deck Footers. And they were every bit as easy to install as your videos indicate, and the deck is perfectly level and solid. I'm a believer!
Rusty Allen, Columbus, OH
Would Take an F5 Tornado...
I wanted to let you know that we received the shipment of Titan Deck Footings and have begun construction on our deck. Thus far I am VERY pleased with your product. I think it would take an F5 tornado to rip up what I’ve built so far. :-) Seriously, I can’t thank you enough. Your deck footings have saved me countless hours and effort.
Eric Tucker - MA

Definitely Use Them Again
Easy installation into clay. 20 min for 3 deck foot anchors. Be sure to remove sod and add gravel to LEVEL ground. After that was complete it was simple to drill down the post part and then ratchet the nut tight.
I was using them on a small 10'x8' deck. I used a small post 21" to hold a beam for the joist.
It is solid and secure.
This product worked very well in this situation. NO cement to mix is a nice benefit. I would definitely use them again.
Chris Collins - Waterloo, ON
Very Slick Idea
Very slick idea and a lot less work than setting posts in concrete or using deck blocks.
For my project I would have needed 60 bags of concrete or a lot of deck blocks.
The Deck Foot is very light and the installation with an impact wrench goes very fast with minimal preparation. I used the 4x4 and would probably use the 6x6 next time to give some more room to notch posts.
Richard Todd - Kitchener, ON
WE LOVED IT
"We used the Snap'n Lock ™Baluster System for our deck railing and we LOVED it. It was so easy to install and looks great! All of our neighbors have been asking about it. They have never seen anything like it."
Linda Johnson, Gualala, CA
THRILLED WITH YOUR BALUSTERS
"We are thrilled to have used your balusters for the first time on a deck we recently completed. The client was so thrilled we are now reno-ing their front entrance way with the balusters"
Digg Contracting, Parksville, BC
YOUR PRODUCTS ARE AWESOME
"The deck turned out fantastic. Thanks for your help the Titan products worked great! I think your products are awesome."
Erich Neumann, Ottawa, ON
BEST ANCHOR I'VE USED
"We just completed our deck this past weekend and I have to say I'm extremely happy with both the performance and ease of use of the Titan Post Anchors.
Overall a great product way better than the Simpson Strong Ties I've used in the past which have that tall ugly box at the bottom."
Alex McClure - Wylie, TX
NOW I AM SOLD
Was very unsure about the potential of being able to leverage the post loose.
Mounted the first post anchor and was sold, installation is simple and time is definitely saved. I will be using these post till I find something better.
This is a great alternative to all other expensive bases. I have used my share of the expensive bases and this is by far the best for your money.
Dumette Construction LLC - Gilmanton, NH


Recent Articles
-
Pergola on brick paver
Apr 05, 25 05:36 PM
I have a brick paver patio that has been in for 10 years and I would like to know if the deck anchor will penetrate the gravel/sand base -
Durability of Titan deck foot
Apr 05, 25 05:20 PM
Hi, can you advise the estimated life of a Titan Deck Foot installed in the ground? How long is it expected to last? I live in an area in Ontario Canada -
10x8 6 person spa deck
Jul 26, 22 12:17 PM
I think I might be over-engineering this but I live in CT and I'm also worried about snow weight. Adding a 8x10 deck attached to existing deck, 2x10's


It's time to start
making your memories.

How-To
Go Learn More
© 2004-2026 Decksgo.com. All Rights Reserved.